2024-07-08:新增界面样例。点击下载《界面样例-240708.zip》
2024-07-09:新增界面样例说明。html5+css3入门指导
前言
学生信息管理系统/图书馆信息管理系统/……等信息管理系统,是被广泛使用的、和数据库技术结合的信息管理系统。一个信息管理系统,需要有人机交互界面,供用户、系统管理员等使用,实现和提供信息的增删改查等核心能力和功能。人机交互界面有很多种形式,以及很多种技术实现方式。在当今互联网高速发展时代,在人们日常生活中出现较多的人机交互界面有手机App界面、微信等小程序界面、个人电脑/Pad等Web界面,等。
本指南选取日常生活中出现较多的Web界面,提供相关的开发指南建议,用于某某信息管理系统。Web界面通常在个人电脑、Pad上使用,在手机上也可以使用。
Web界面开发有很多方式。本指南选取基本的“三件套”方式,即 html + css + javascript。本指南适合于没有开发过 Web 界面的同学,将从零开始,一步步实现用于某某信息管理系统的 Web 界面。
几点说明
- 自愿加入和退出。开发 Web 界面用于某某信息管理系统,只是界面开发的一个选项,可以用其他方法比如 Python 开发界面。因此,可随时加入,也可随时退出。
- 并不是完整的 Web 界面开发教程。只是协助同学完成用于某某信息管理系统的 Web 界面的开发。重点还是在数据库。
- 适合:想做 Web 界面用于某某信息管理系统,但尚未接触 Web 界面开发的同学。
- 提前告知需要协助的事项。比如希望通过 Web 界面对数据库做某某操作,是否可以;比如,Web 界面想做成这个样子,是否可行;等等。希望提前告知留些余量,因为需要花点时间做尝试。
预期收获
- Web 界面开发的一次成功实践。 因为有原型可供参考,所以能成功。
- 在投入可控的前提下,做出一个相对高大上的 Web 界面。因为有原型可供参考,所以有大概率能做出来相对高大上的界面。如果数据库设计实现也很出色,则有几率获得更高评价。
-
再次加深要关注工程化能力的意识。不仅要实现正确的功能,还要多多思考、并尽可能多的实践如何做一个可商业化交付的应用。以下各项将尽可能多的涉及/提及:
- 关注编程规范
- 关注数据库设计和实现规范
- 关注界面设计和实现规范。即,如何做一个高大上的界面。
- 关注用户体验。交互过程/流程符合用户的通常习惯,而不是程序员的习惯。
- 关注安全性。比如不能在配置文件中写用户名和口令明文。比如提供找回密码的系统通常安全性待增强。
- 关注隐私保护。比如隐私保护需要保护哪些信息,如何安全的保存用户的手机号码等信息,等等。 关于版权保护。视频、图片,甚至字体,都是有版权保护的。如何确保不侵权,等等。
- ……。
- 践行终生学习。在今后的科研和工作中,总会遇到需要使用的但尚未掌握的知识或技能。如何快速学会并应用到科研和工作中,希望通过此次 Web 界面开发实践得到启发。
初识Web页面/界面
Hello World -- html
按惯例,总是先写一个 Hello World! 程序,虽然 html 不是编程语言。新建 hello-world.html,内容如下:
<!DOCTYPE html>
<html>
    <head>
        <meta charset="utf-8">
        <title>Personal Website of George Donne</title>
    </head>
    <body>
        <h1>My First Web Page</h1>
        <p>Hello World!</p>
    </body>
</html>点击样例:Hello World -- html
一个基本界面 -- html + css
对于某某信息管理系统,查询是使用很频繁的功能。仿照百度等首页,用html写一个基本界面。参考代码如下:
<!DOCTYPE html>
<html>
<head>
<title>某某信息管理系统</title>
</head>
<body>
<header>
<h1>某某信息管理系统</h1>
</header>
<nav>
<!-- 导航栏有3个链接,点击后分别跳转到相应页面。比如点击 [新增] 后,跳转到 /student/get 页面。此处 # 表示跳转到本页面,仅供演示用。 -->
<a href="#">新增</a>
<a href="#">统计</a>
<a href="#">关于</a>
</nav>
<main>
<!-- form之action填写实际访问的网址,比如 /student/get。此处#仅供演示。-->
<form method="GET" action="#">
<input type="text" name="key" placeholder="输入4位数字的学号" />
<input type="submit" value="查询" />
</form>
</main>
<footer>
<p>© George Donne 2024-2025.</p>
<p>support:
<a href="mailto:georgedonnev2@outlook.com">georgedonnev2@outlook.com</a>
</p>
</footer>
</body>
</html>点击样例:一个基本界面 -- html
使用css调整和优化界面的显示,让界面看上去和百度等类似。在 <head></head> 中增加以下参考代码:
<style>
    /*
    1、简化起见将 css 写在 html 里面,仅用于演示。
    2、通常单独 css 文件并在html中引用,比如:
    */

    /* 把所有填充padding、边距margin 设为0,以方便调整样式 style。*/
    * {
        padding: 0;
        margin: 0;
    }
    /* 默认字号设置 */
    html {
        font-size: 16px;
    }
    body {
        /* 90%宽度;顶部空一些*/
        max-width: 90vw;
        margin: auto;
        padding-top: 1rem;
        /* 设置字体,采用 vscode 推荐值。*/
        font-family: system-ui, -apple-system, BlinkMacSystemFont, 'Segoe UI', Roboto, Oxygen, Ubuntu, Cantarell, 'Open Sans', 'Helvetica Neue', sans-serif;
    }
    /* 针对“莫某信息管理系统”
    *  1、字号2倍大,
    *  2、颜色灰,背景浅灰
    *  3、文字居中
    *  4、文字和浅灰背景框空点距离
    */
    h1 {
        font-size: 2rem;
        color: #666;
        background-color: #eee;
        text-align: center;
        padding: 0.5rem;
    }
    /* 导航栏设置:3个链接平均分布*/
    nav {
        display: flex;
        align-items: center;
        justify-items: center;
        min-height: 2rem;
    }
    nav a {
        font-size: 0.75rem;
        margin: auto;
    }
    /* 查询框设置
    ** 1、所在区域最小高度 500 px
    ** 2、居中对齐
    ** 3、字号1.25倍即 20 px
    ** 4、查询框和按钮的最小高度是字号的2倍即32 px
    */
    main {
        display: flex;
        align-items: center;
        justify-items: center;
        min-height: 500px;
    }
    form {
        margin: auto;
    }
    input {
        font-size: 1.25rem;
        padding: 0.5rem;
        min-height: 2rem;
    }
    /* 底部设置
    ** 字号0.75倍即 12px;颜色灰,背景浅灰。
    */
    footer {
        display: flex;
        flex-direction: column;
        align-items: center;
        justify-items: center;
        font-size: 0.75rem;
        color: #999;
        background-color: #eee;
        padding: 0.5rem;
    }
</style>点击样例:一个基本界面 -- html+css
Web界面架构设计和搭建
界面交互流程设想
- 在浏览器地址栏输入网址并回车,浏览器显示网站首页,中间有个查询输入框,输入学号按查询按钮可以查询学生信息。
- 点击网站首页右上方导航栏中的新增,出现新增页面,输入相关信息后,点击提交按钮,可新增一个学生的相关信息。
- 更新、删除,也是类似。
一些预备知识
有兴趣的同学可以快速浏览以下几篇文章,做到知晓就可以了。文章中的更多链接,可以今后再点击查看,先快速浏览文章本身内容。
在Windows或macOS上安装 Node 和 NPM
在 Windows 和 macOS 上安装 Node 和 NPM 非常简单明了,使用现成的安装包就行了:
- 下载安装包:
- 访问 https://nodejs.org/zh-cn/
- 左侧按钮上写着“推荐多数用户使用(LTS)”,点击下载。
- 双击下载的安装包,按照提示即可安装。
检查 Node 是否成功安装的最简单方法就是在终端(或命令行)中运行 "version" 命令,看是否返回版本号字符串。NPM 应该与 Node.js 一同成功安装,可以使用同样的方法来测试一下。以下是macOS zsh为例:
% node -v
v20.12.2
% npm -v
10.5.0
创建 Hello World 网站
新建目录 appdemo,并在该目录下创建 helloworld.js,内容如下:
// 加载 HTTP 模块
const http = require("http");
const hostname = "127.0.0.1";
const port = 3000;

// 创建 HTTP 服务器
const server = http.createServer((req, res) => {
    // 用 HTTP 状态码和内容类型(Content-Type)设置 HTTP 响应头
    res.statusCode = 200;
    res.setHeader("Content-Type", "text/plain");

    // 发送响应体
    res.end("Hello World!\n");
});

// 监听 3000 端口的请求,注册一个回调函数记录监听开始
server.listen(port, hostname, () => {
    console.log(`服务器运行于 http://${hostname}:${port}/`);
});
在命令行工具中进入 helloworld.js 文件所在的目录,输入“node + 文件名”并运行,服务器就启动了:
~/appdemo % node helloworld
服务器运行于 http://127.0.0.1:3000/
在浏览器中访问这个 URL http://127.0.0.1:3000/ 或 http://localhost:3000/,如果一切正常,浏览器会直接显示出 "Hello World!" 字符串。
用 Express 框架创建 Hello World 网站
进入创建的appdemo目录,执行 npm init初始化项目。此命令将要求你输入几个参数,例如此应用的名称和版本。 你可以直接按“回车”键接受大部分默认设置即可,下面这个除外:
entry point: (index.js) # 当前目录如有js文件,则可能显示js文件如helloworld.js。键入 appdemo.js 或者你所希望的名称,这是当前应用的入口文件。如果你希望采用默认的 index.js 文件名,只需按“回车”键即可。
~/appdemo % npm init

This utility will walk you through creating a package.json file.
It only covers the most common items, and tries to guess sensible defaults.

See `npm help init` for definitive documentation on these fields
and exactly what they do.

Use `npm install ` afterwards to install a package and
save it as a dependency in the package.json file.

Press ^C at any time to quit.
package name: (appdemo)
version: (1.0.0) 1.1.1
description: app demo for student information management
entry point: (helloworld.js) appdemo.js
test command:
git repository:
keywords:
author: George Donne
license: (ISC)
About to write to /appdemo/package.json:

{
  "name": "appdemo",
  "version": "1.1.1",
  "description": "app demo for student information management",
  "main": "appdemo.js",
  "scripts": {
    "test": "echo \"Error: no test specified\" && exit 1"
  },
  "author": "George Donne",
  "license": "ISC"
}


Is this OK? (yes) y
在vscode中查看生成的package.json,或者输入如下cat命令查看
~/appdemo % cat package.json以下是package.json的内容:
{
    "name": "appdemo",
    "version": "1.1.1",
    "description": "app demo for student information management",
    "main": "appdemo.js",
    "scripts": {
      "test": "echo \"Error: no test specified\" && exit 1"
    },
    "author": "George Donne",
    "license": "ISC"
}
Node 本身并不支持其他常见的 web 开发任务。如果需要进行一些具体的处理,比如运行其他 HTTP 动词(比如 GET、POST、DELETE 等)、分别处理不同 URL 路径的请求(“路由”)、托管静态文件,或用模板来动态创建响应,那么可能就要自己编写代码了,亦或使用 web 框架,以避免重新发明轮子。
Express 是最流行的 Node 框架,是许多其他流行 Node 框架 的底层库。它提供了以下机制:
- 为不同 URL 路径中使用不同 HTTP 动词的请求(路由)编写处理程序。
- 集成了“视图”渲染引擎,以便通过将数据插入模板来生成响应。
- 设置常见 web 应用设置,比如用于连接的端口,以及渲染响应模板的位置。
- 在请求处理管道的任何位置添加额外的请求处理“中间件”。
执行 npm install express --save,在当前目录(appdemo)下安装 Express。
~/appdemo % npm install express --save
added 64 packages, and audited 65 packages in 9s

12 packages are looking for funding
  run `npm fund` for details

found 0 vulnerabilities在当前目录下新建 helloworld-express.js,文件内容如下:
const express = require("express");
const app = express();

app.get("/", (req, rsq) => {
    rsq.send("Hello World!");
});

app.get("/user/:id", (req, rsq) => {
    rsq.send("Hello " + req.params.id + " !");
});

app.listen(8000, () => {
    console.log("示例程序正在监听 8000 端口!");
});
输入“node + 文件名”并运行,服务器就启动了:
~/appdemo % node helloworld-express
示例程序正在监听 8000 端口!
在浏览器中输入不同的URL,观察浏览器的输出的变化:
- 在浏览器中访问这个 URL http://127.0.0.1:8000/ 或 http://localhost:8000/,如果一切正常,浏览器会直接显示出 "Hello World!" 字符串。
- 在浏览器中访问这个 URL http://127.0.0.1:8000/user/george 或 http://localhost:8000/user/george,如果一切正常,浏览器会直接显示出 "Hello george !" 字符串。将URL中的george改成其他比如张三,则浏览器得到显示"Hello 张三 !" 字符串
可以看到:在浏览器中输入不同的URL,可以得到不同的显示。这正是所需要的。
生成Web界面应用的框架
Express 应用生成器工具(express-generator)可以生成一个 Express 应用的“框架”。然后在该框架上做修改,就可以快速完成某某信息管理系统的Web界面。
执行 npx express-generator --view=pug,安装express应用生成器工具,并指定模板引擎是pug。
~/appdemo % npx express-generator --view=pug
destination is not empty, continue? [y/N] y

   create : public/
   create : public/javascripts/
   create : public/images/
   create : public/stylesheets/
   create : public/stylesheets/style.css
   create : routes/
   create : routes/index.js
   create : routes/users.js
   create : views/
   create : views/error.pug
   create : views/index.pug
   create : views/layout.pug
   create : app.js
   create : package.json
   create : bin/
   create : bin/www

   install dependencies:
     $ npm install

   run the app:
     $ DEBUG=appdemo:* npm start
根据 npx express-generator --view=pug 命令执行结果中的提示,执行 npm install 安装依赖(install dependencies)。
~/appdemo % npm install
npm WARN deprecated core-js@2.6.12: core-js@<3.23.3 is no longer maintained and not recommended for usage due tothe number of issues. Because of the V8 engine whims, feature detection in old core-js versions could cause aslowdown up to 100x even if nothing is polyfilled. Some versions have web compatibility issues. Please, upgradeyour dependencies to the actual version of core-js.

added 71 packages, removed 4 packages, changed 20 packages, and audited 132 packages in 16s

13 packages are looking for funding
  run `npm fund` for details

7 vulnerabilities (2 low, 5 high)

To address issues that do not require attention, run:
  npm audit fix

To address all issues, run:
  npm audit fix --force

Run `npm audit` for details.
根据 npx express-generator --view=pug 命令执行结果中的提示,执行 DEBUG=appdemo:* npm start。
/appdemo % DEBUG=appdemo:* npm start
> appdemo@0.0.0 start
> node ./bin/www
appdemo:server Listening on port 3000 +0ms
GET / 200 459.436 ms - 170
GET /stylesheets/style.css 200 5.110 ms - 111
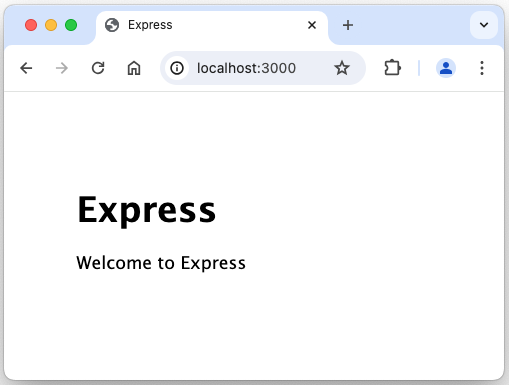
GET /favicon.ico 404 14.436 ms - 1202打开浏览器并访问 http://127.0.0.1:3000/ 将看到 Express 的默认欢迎页面。
架构/骨架子搭建小结
至此,Web界面应用的骨架子终于有了。接下来:
- 填充真实内容到骨架子中,让骨架子更接近真实更饱满。
- 操作数据库,显示真实数据。
- 美化Web界面,取得高大上视觉效果。
修改完善Web服务器框架
安装nodemon提升开发效率
接下来会频繁修改完善框架。只有重启服务器才能看到 Express 网站所做的改动。每次改动后手动启停服务器实在太烦人了,有必要花点时间让这项工作自动化。nodemon 是最简便的自动化工具之一。执行 npm install --save-dev nodemon 安装nodemon。
~/appdemo % npm install --save-dev nodemon

added 29 packages, and audited 161 packages in 8s

17 packages are looking for funding
  run `npm fund` for details

7 vulnerabilities (2 low, 5 high)

To address issues that do not require attention, run:
  npm audit fix

To address all issues, run:
  npm audit fix --force

Run `npm audit` for details.
找到 package.json 的 scripts 部分。在 "start" 一行的末尾添加逗号,并在新的一行中添加 "devstart",如下所示:
"scripts": {
    "start": "node ./bin/www",
    "devstart": "nodemon ./bin/www"
},
后续将执行 DEBUG=appdemo:* npm run devstart 启动web服务器。
/appdemo % DEBUG=appdemo:* npm run devstart

> appdemo@0.0.0 devstart
> nodemon ./bin/www

[nodemon] 3.1.0
[nodemon] to restart at any time, enter `rs`
[nodemon] watching path(s): *.*
[nodemon] watching extensions: js,mjs,cjs,json
[nodemon] starting `node ./bin/www`
  appdemo:server Listening on port 3000 +0ms
进一步细化确定Web页面交互流程
查询信息的主要交互流程:
- 在浏览器输入 http://localhost:3000。
- Web服务器收到请求后,返回某某信息管理系统的主页面。页面中有输入框,可以输入学号查询学生信息。
- 用户在输入框输入学号,点击查询按钮,发送 HTTP-GET 请求,URL是 http://localhost:3000/student/get?key=1234。其中 key=1234 表示要查询学号是 1234 的同学的详细信息。
- Web后台服务器收到请求后,查询数据库,得到学号 1234 同学的详细信息,并将信息以 Web页面方式返回浏览器,展示给用户。
关于学生的详细信息的Web页面,主要内容有:
- 学号、性别、姓名、电话,等等。以及相关课程的成绩。
- 详细信息Web页面底部,有 Delete 链接。点击后,可从数据库中删除该学生的记录。
- 详细信息Web页面底部,有 Update 链接。点击后,可更新该学生在数据库中的信息。
新增学生的主要交互流程:
- 点击主页面导航栏的新增选项,向Web服务器发送 HTTP-GET请求,URL是 http://localhost:3000/student/create。
- Web服务器收到请求后,返回新增信息的Web页面。用户输入相关信息后点击页面上的提交按钮,向Web服务器发送 HTTP-POST 请求,URL还是 http://localhost:3000/student/create。
- Web后台服务器收到POST请求后,将相关信息写入数据库,并返回学生详细信息(刚刚写入数据库的那个学生)页面给浏览器。
关于新增学生的Web页面,主要内容有:
- 有若干输入框,供输入学号、性别、姓名、电话,等等。
- Web页面上有提交按钮。
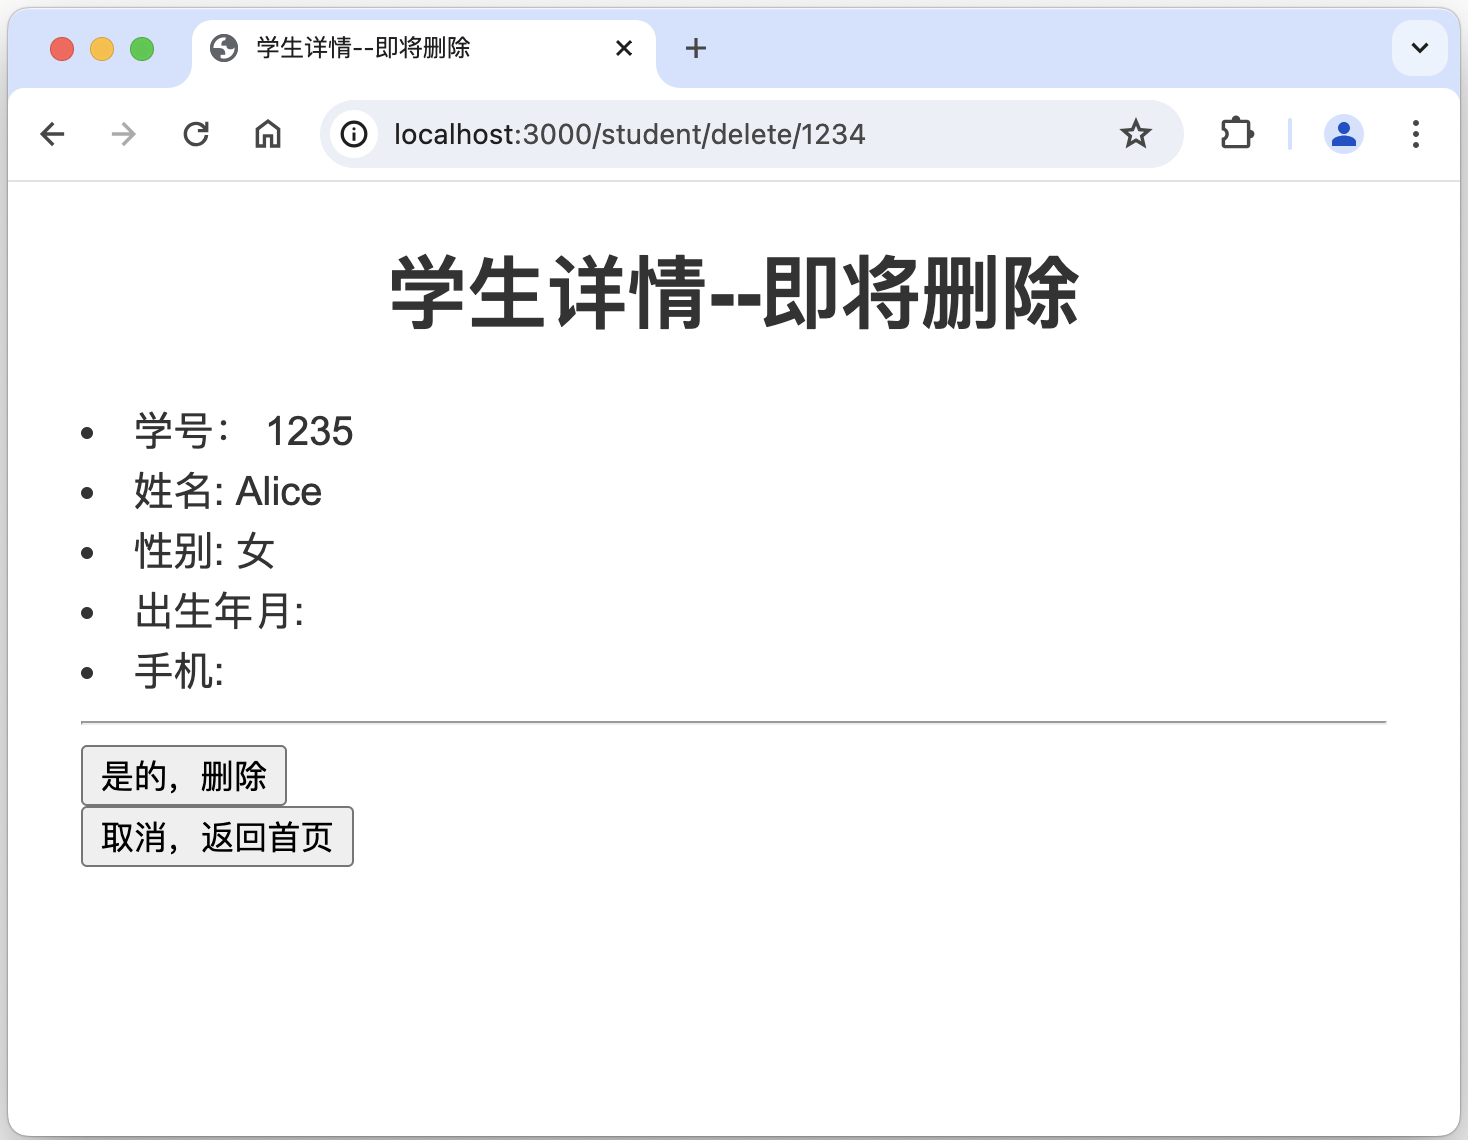
删除学生的主要交互流程:
- 简化起见,仅提供从查询得到的学生详情页面底部的删除链接,进行删除操作。点击学生详情页面底部的删除链接,向Web服务器发送 HTTP-POST请求,删除该学号的学生信息,URL是 http://localhost:3000/student/delete。
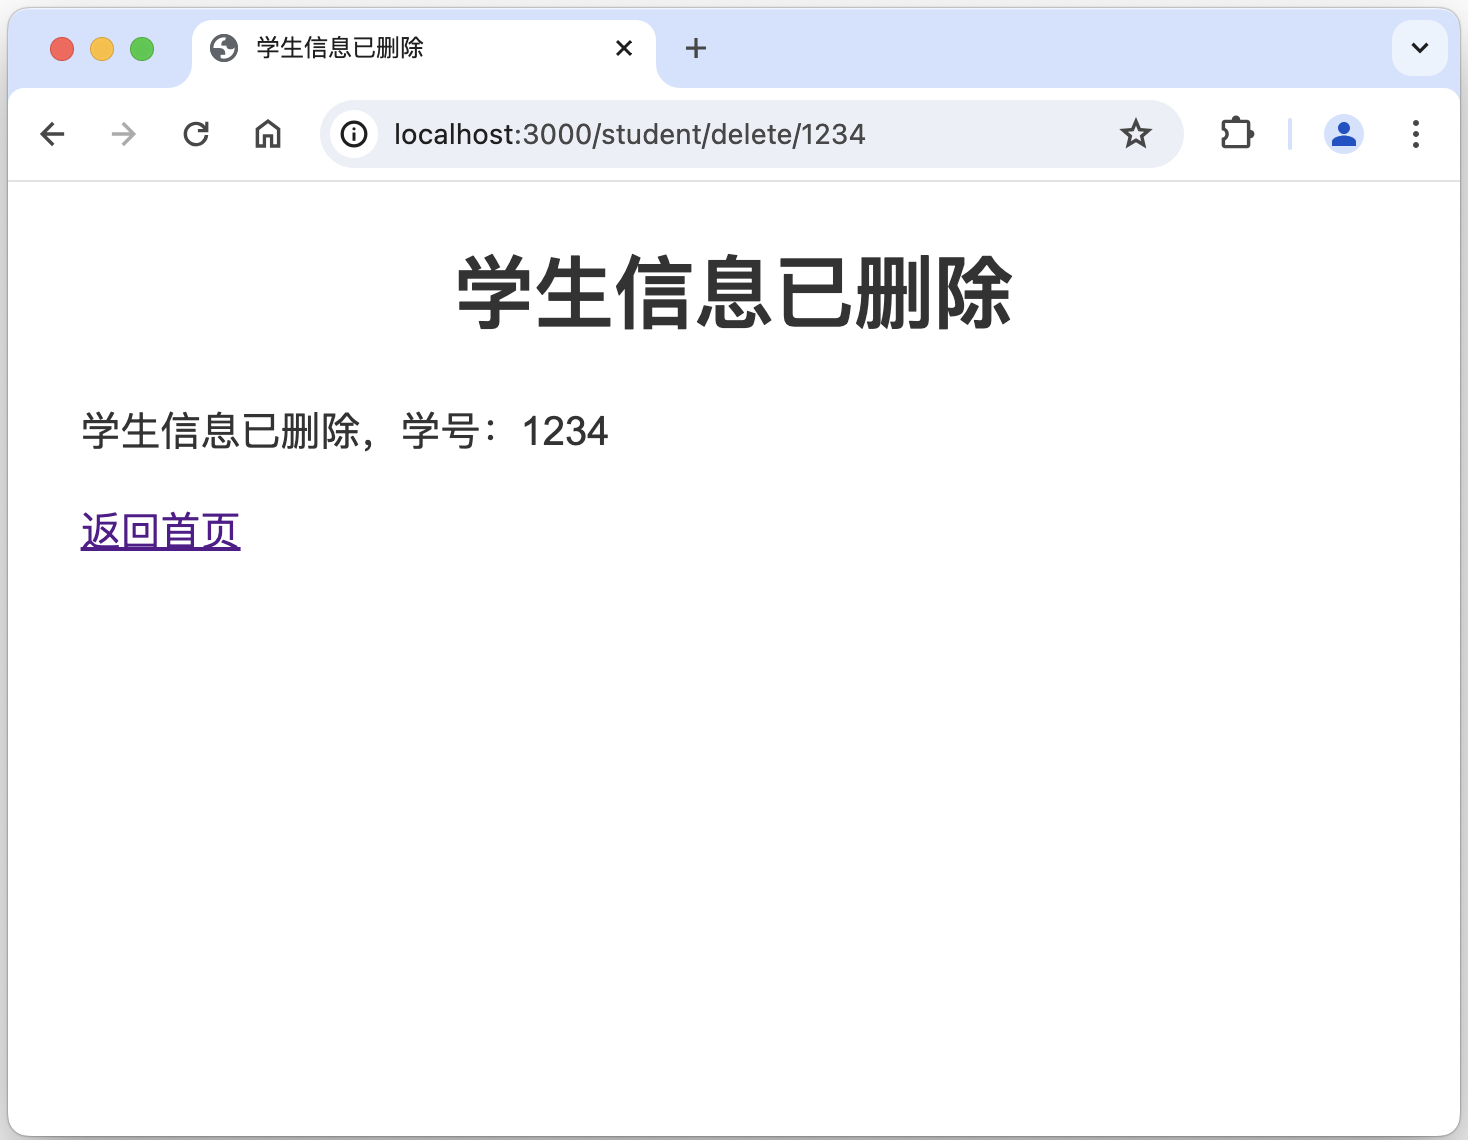
- Web后台服务器收到POST请求后,从数据库中删除该学号的学生信息。操作完成后,返回删除成功等信息给浏览器。
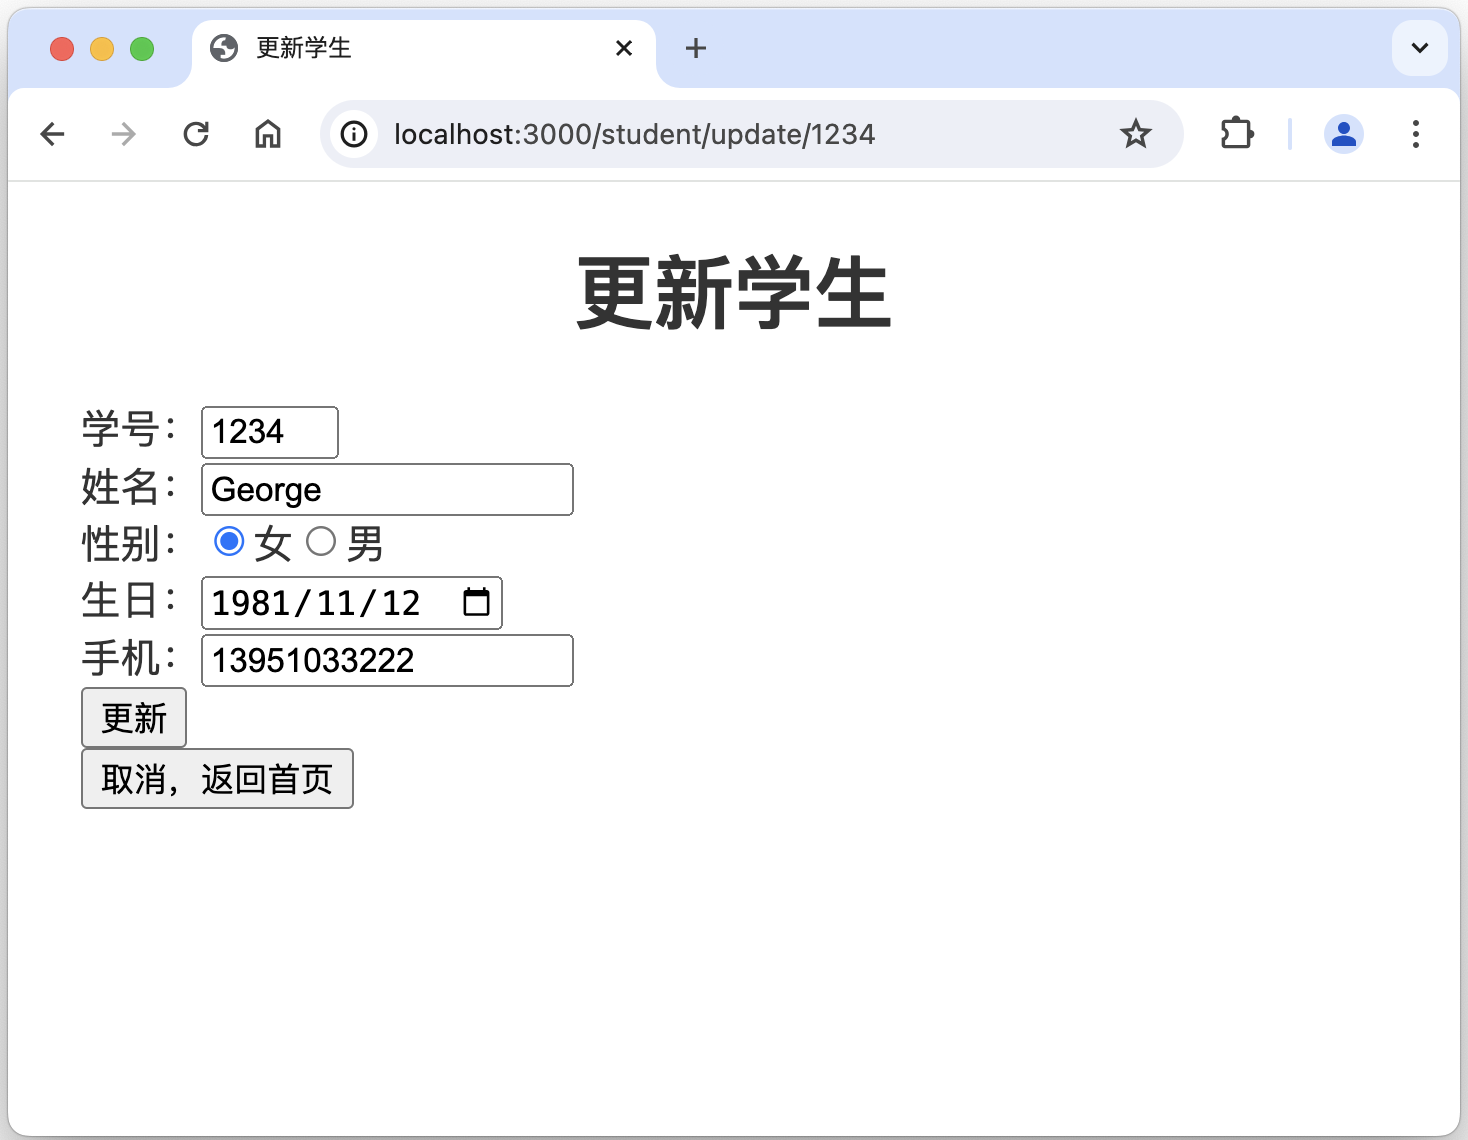
更新学生的主要交互流程:
- 简化起见,仅提供从查询得到的学生详情页面底部的更新链接,进行更新操作。点击学生详情页面底部的更新链接,向Web服务器发送 HTTP-GET请求,要求更新该学号的学生信息,URL是 http://localhost:3000/student/update。
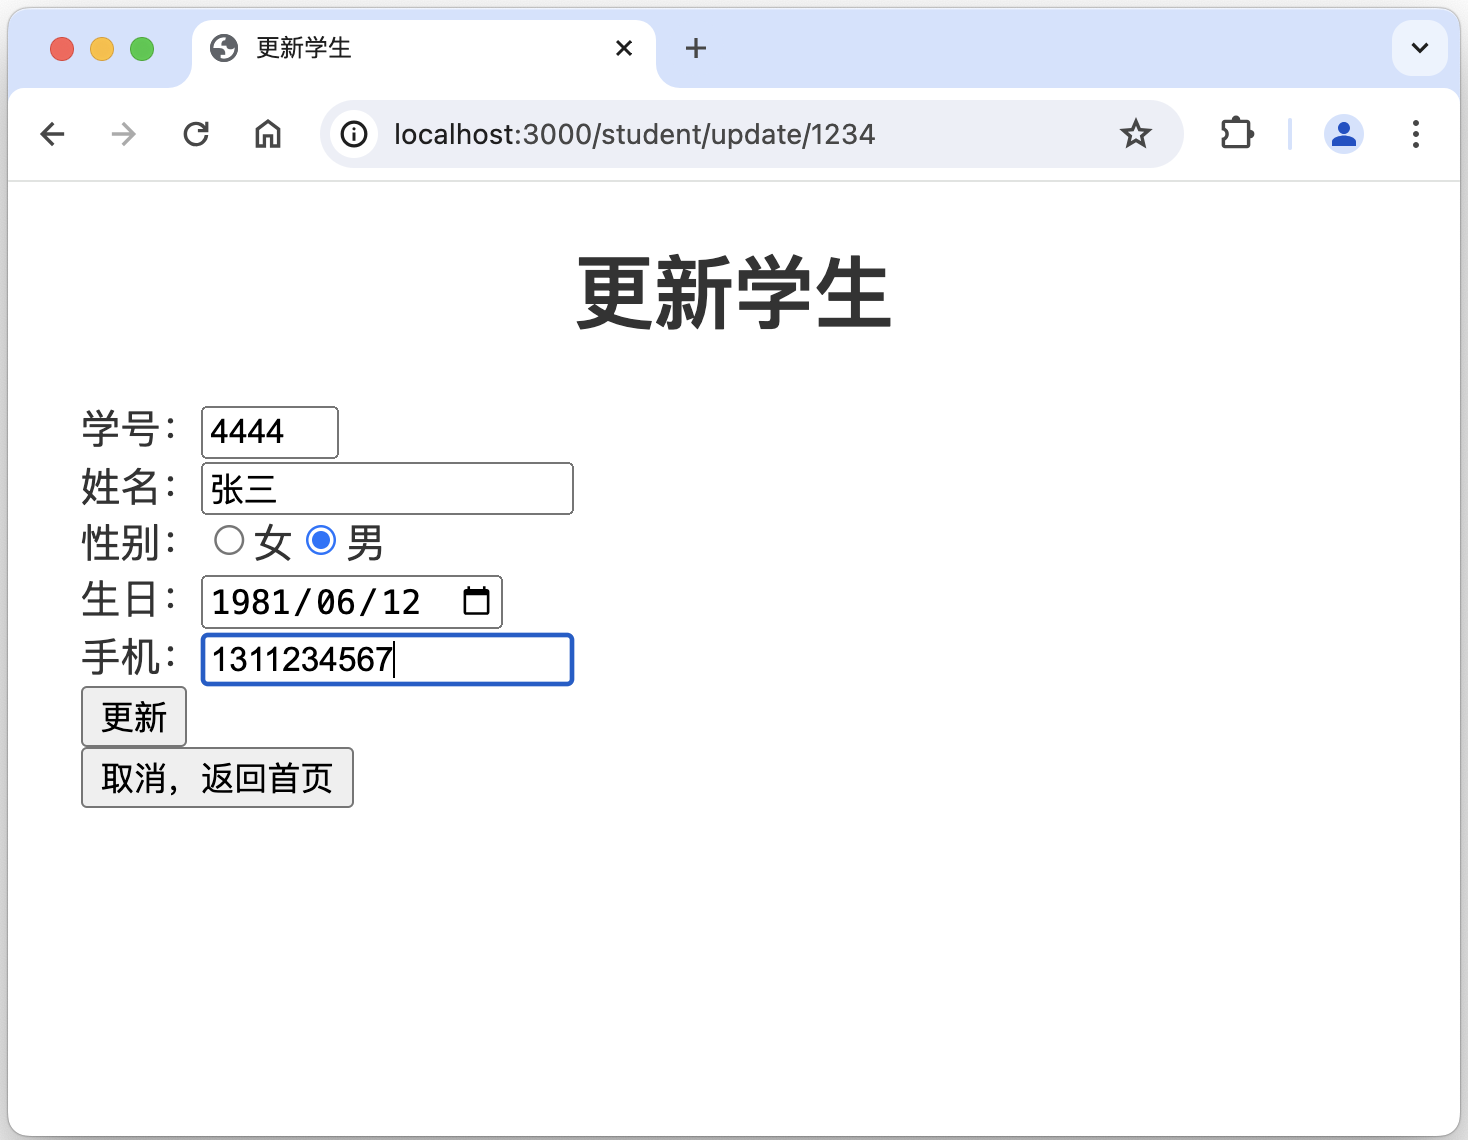
- Web服务器收到请求后,返回类似新增信息的Web页面,只是相关输入框已填充了该学号的学生的现有信息。用户更改相关信息后点击页面上的提交按钮,向Web服务器发送 HTTP-POST 请求,URL还是 http://localhost:3000/student/update。
- Web后台服务器收到POST请求后,将相关信息写入数据库,并返回学生详细信息(刚刚更新写入数据库的那个学生)页面给浏览器。
Web服务框架简介--路由
先了解下Web服务框架的内容,以便做相应修改完善。只简介要修改的部分。
以下是目录 appdemo 中相关文件:
app.js
./bin
./node_modules
package-lock.json
package.json
./public
./routes
    index.js
    users.js
./views
    error.pug
    index.pug
    layout.pug

# 以下是前面测试使用的2个文件,最终Web服务器框架中不会使用到
helloworld-express.js
helloworld.js
路由就是定义不同的URL该如何处理。在框架中是由 app.js 中路由相关代码,和 routes 目录中 js 文件共同定义的。
以下是 app.js 中和路由相关的代码片段:
var indexRouter = require('./routes/index');
var usersRouter = require('./routes/users');

// some other codes...

app.use('/', indexRouter);
app.use('/users', usersRouter);
以下是 ./routes/users.js 的代码。其中 / 路由是框架中现有的,/cool 路由是新增的,为了便于理解路由是怎么工作的。
路由文档 /routes/users.js 如下所示。首先加载 express 模块并获取 express.Router 对象(命名为router)。然后为 router 指定路由,最后导出
router(就可以导入 app.js 了)。
该路由定义了一个回调,在检测到正确模式的 HTTP GET 请求时将调用该回调。正确模式即导入模块时指定的路由('/users')加该模块('/')中定义的任何内容。换句话说,在收到 /users/ URL
时使用此路由。
var express = require('express');
var router = express.Router();

/* GET users listing. */
router.get('/', function (req, res, next) {
    res.send('respond with a resource');
});

// GET users/cool.
router.get('/cool', function (req, rsp, next) {
    rsp.send("I'm George, I'm cool!");
});

module.exports = router;
以下是 ./routes/index.js 中和路由相关的代码片段。其中 / 路由是框架中现有的,/about 路由是新增的,为了便于理解路由是怎么工作的。
/* GET home page. */
router.get('/', function (req, res, next) {
    res.render('index', { title: 'Express' });
});

// GET about page.
router.get('/about', function (req, rsp, next) {
    rsp.send('This is about page.');
});
可以对路由做相关测试,以便加深了解。在浏览器中输入不同的 URL,将得到不同的结果,如下:
- 输入 http://localhost:3000/,得到结果:Express Welcome to Express。res.render('index', { title: 'Express' }) 使用到了页面模版,由第一个参数指定模版是 ./views/index.pug。将在下个章节做简介。
- 输入 http://localhost:3000/about,得到结果:This is about page.
- 输入 http://localhost:3000/users,得到结果:respond with a resource
- 输入 http://localhost:3000/users/cool,得到结果:I'm George, I'm cool!
修改为真实的路由
在 routes 目录下新建 student.js,创建 student 相关的完整路由。内容如下:
const express = require("express");
const router = express.Router();

// 导入控制器模块
const student_controller = require("../controllers/studentController");

// GET 主页面
router.get("/", student_controller.index);

// GET 获取学生信息
router.get("/get", student_controller.student_get);

// 新增学生信息,先 GET 请求后获得填写信息的页面。信息填写好后按提交按钮,发送 POST 请求。
router.get("/create", student_controller.student_create_get);
router.post("/create", student_controller.student_create_post);

// 删除学生信息,先 GET 请求后获得学生信息。按提交按钮,发送 POST 请求删除。
router.get("/delete/:id", student_controller.student_delete_get);
router.post("/delete/:id", student_controller.student_delete_post);

// 更新学生信息,先 GET 请求后获得填写信息的页面。信息填写好后按提交按钮,发送 POST 请求。
router.get("/update/:id", student_controller.student_update_get);
router.post("/update/:id", student_controller.student_update_post);

module.exports = router;
在 app.js 增加如下 2 行 studentRouter 相关的,让 student.js 定义的路由起作用。
var indexRouter = require('./routes/index');
var usersRouter = require('./routes/users');
var studentRouter = require('./routes/student'); // routes for student related request

// some other codes...

app.use('/', indexRouter);
app.use('/users', usersRouter);
app.use('/student', studentRouter); // realted url will be ip+port followed by /student. e.g. http://localhost:3000/student, http://localhost:3000/student/get, etc.
index.js 也微调如下。当输入 URL 为 localhost:3000 或 localhost:3000/index.html,会当做 localhost:3000/student 处理的。即被重定向(redirect)到 /student。
/* GET home page. */
router.get('/', function (req, res, next) {
    //res.render('index', { title: 'Express' });
    res.redirect("/student"); // redirect to ip+port/student if get request by ip+port.
});

router.get('/index.html', function (req, res, next) {
    res.redirect("/student"); // redirect to ip+port/student if get request by ip+port/index.html.
});
至此,真实路由已定义好了。小结如下:
(ip和端口号,以 localhost:3000为例)
- http://localhost:3000/student,发送 GET 请求,获取主页面。
- http://localhost:3000/student/get,发送 GET 请求,查询学生信息。
- http://localhost:3000/student/create,发送 GET 请求,新建学生信息。Web服务器收到请求后将返回页面用于填写信息。
- http://localhost:3000/student/create,发送 POST 请求,新建学生信息。Web服务器收取请求后将把新增学生的信息写入数据库。
- http://localhost:3000/student/delete/1234,发送 GET 请求,删除学生信息。Web服务器收到请求后,将返回页面要求确认是否删除。/delete/:id 是指在 URL 中delete后面跟随学号,此处以学号 1234 为例。下同。
- http://localhost:3000/student/delete/1234,发送 POST 请求,删除学生信息。Web服务器收到请求后,将会从数据库中删除学生的信息。
- http://localhost:3000/student/update/1234,发送 GET 请求,更新学生信息。Web服务器收到请求后,将返回页面用于编辑学生信息。/update/:id 是指在 URL 中 update 后面跟随学号,此处以学号 1234 为例。下同。
- http://localhost:3000/student/update/1234,发送 POST 请求,更新学生信息。Web服务器收到请求后,将把更新的学生信息写入数据库。
- http://localhost:3000,发送 GET 请求,将被当做 http://localhost:3000/student处理,即被重定向到 /student。
- http://localhost:3000/index.html,发送 GET 请求,将被当做 http://localhost:3000/student处理,即被重定向到 /student。
编写Web后台服务器处理函数
新建目录 controllers,并在 controllers 目录下新建 studentController.js,定义路由的回调函数(即具体做的事情)。内容如下:
说明:拟采用 MVC(Models + Views + Controllers)方式实现,代码结构比较清晰,也相对容易扩展。由于时间关系对 Models 理解不深,因而此处的 Controllers 实际上是 Controllers + Models 混在一起了。Views 就是对应页面模版。
/// Home Page
/**
* 1. to respond GET request by URL: localhost:3000 or localhost:3000/index.html or localhost:3000/student. localhost:3000 is an example of ip:port.
* 2. to return HOME page (rendered with home.pug) to browser.
*/
exports.index = async function (req, rsp, next) {
try {
rsp.render(
'home',
{
title: '学生宝--学生信息管理信息',
}
);
} catch (e) {
console.error(e);
rsp.send(e);
}
};
/// Get student information
/**
* 1. to respond GET request by URL: localhost:3000/student/get.
* 2. to return student detail page (rendered with student_detail.pug) to browser.
*/
exports.student_get = async function (req, rsp, next) {
try {
const studentInf = [
{ "jnuid": 1234, "name": "George", "gender": "男" },
]
rsp.render(
'student_detail',
{
title: '学生详情',
student_inf: studentInf,
}
);
} catch (e) {
console.error(e);
// await prisma.$disconnect();
rsp.send(e);
}
};
/// Create new student
/**
* 1. to respond GET request by URL: localhost:3000/student/create.
* 2. to return input page (rendered with create.pug) to browser.
*/
exports.student_create_get = async function (req, rsp, next) {
try {
rsp.render(
'create',
{
title: '新增学生',
}
);
} catch (e) {
console.error(e);
rsp.send(e);
}
};
/// Create new student
/**
* 1. to respond POST request by URL: localhost:3000/student/create.
* 2. to return student detail page to browser if operation is done.
*/
exports.student_create_post = async function (req, rsp, next) {
try {
// insert student information into database.
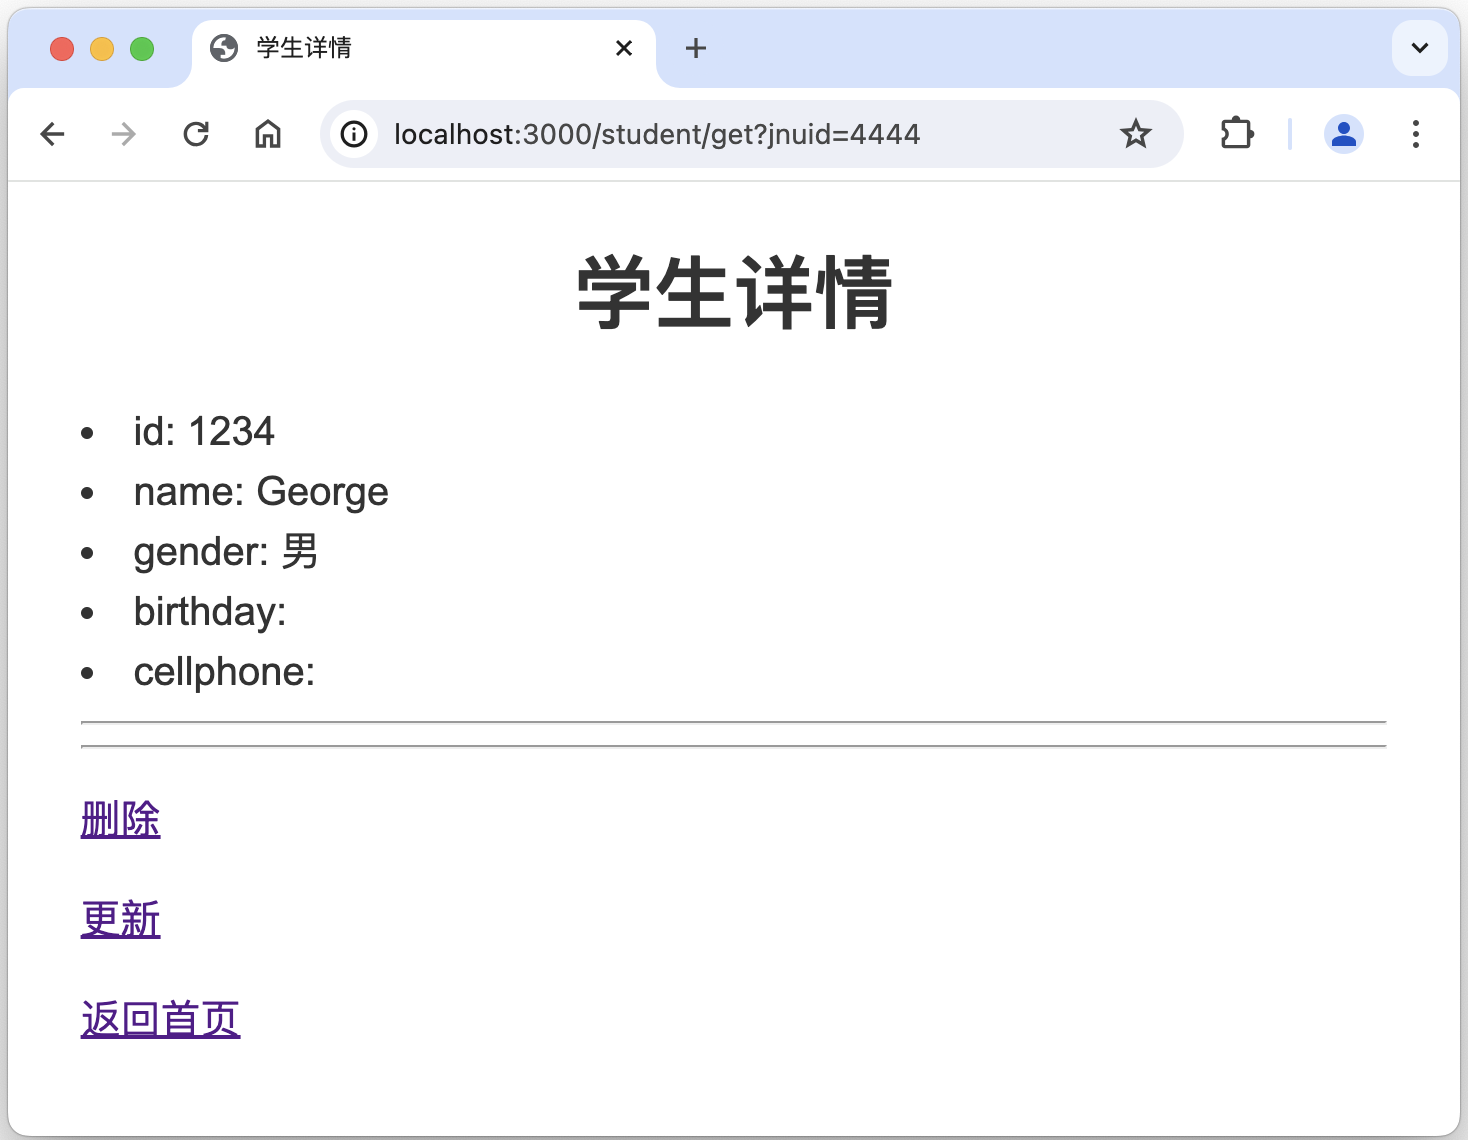
rsp.redirect("/student/get?jnuid=" + req.body.jnuid);
} catch (e) {
console.error(e);
rsp.send(e);
}
};
/// Delete a student
/**
* 1. to respond GET request by URL: localhost:3000/student/delete/:id. e.g., delete/1234.
* 2. to return confirm page (rendered with delete_get.pug) to browser.
*/
exports.student_delete_get = async function (req, rsp, next) {
try {
const studentInf = [
{ "jnuid": 1235, "name": "Alice", "gender": "女" },
]
rsp.render(
'delete_get',
{
title: '学生详情--即将删除',
student_inf: studentInf,
}
);
} catch (e) {
console.error(e);
rsp.send(e);
}
};
/// Delete a student
/**
* 1. to respond POST request by URL: localhost:3000/student/delete/:id. e.g., delete/1234.
* 2. to return notification page (rendered with delete_post.pug) to browser.
*/
exports.student_delete_post = async function (req, rsp, next) {
try {
// operation to added to delete student information from database.
rsp.render(
'delete_post',
{
title: '学生信息已删除',
stuid: req.params.id,
}
);
} catch (e) {
console.error(e);
rsp.send(e);
}
};
/// Update a student
/**
* 1. to respond GET request by URL: localhost:3000/student/update/:id. e.g., update/1234.
* 2. to return update information page (rendered with update.pug) to browser.
*/
exports.student_update_get = async function (req, rsp, next) {
try {
const studentInf = [
{ "jnuid": 1234, "name": "George", "gender": "女", "birthday": "1981-11-12", "cellphone": 13951033222 },
]
rsp.render(
'update',
{
title: '更新学生',
student_inf: studentInf,
}
);
} catch (e) {
console.error(e);
// await prisma.$disconnect();
rsp.send(e);
}
};
/// Update a student
/**
* 1. to respond POST request by URL: localhost:3000/student/update/:id. e.g., update/1234.
* 2. to return student detail page to browser if operation is done.
*/
exports.student_update_post = async function (req, rsp, next) {
try {
rsp.redirect("/student/get?jnuid=" + req.body.jnuid);
} catch (e) {
console.error(e);
rsp.send(e);
}
};相关的 web页面/html页面的模版如下。
home.pug:在函数 index 中被使用。
extends layout
block content
header#homeheader
h1= title
nav
ul
li
a(href="/") 首页
li
a(href="/student/create") 新增
li
a(href="/about") 关于
main
form#homeform(method='GET' action='/student/get')
input#homekey(type='text' name='key' placeholder="输入4位数字学号")
input#homesubmit(type='submit' value='查询')
if errors
ul
for error in errors
li!= error.msg
footer#homefooter
p © George Donne 2024-2025.student_detail.pug:在 student_get 函数中使用。
extends layout
block content
  h1= title

  ul
  each val in student_inf
    li id: #{val.jnuid}
    li name: #{val.name}
    li gender: #{val.gender}
    li birthday: #{val.birthday}
    li cellphone: #{val.cellphone}
    hr
  else
    li 没有查询到!

  hr
  p
    a(href='/student/delete/' + student_inf[0].jnuid) 删除

  p
    a(href='/student/update/' + student_inf[0].jnuid) 更新
  p
a(href="/") 返回首页create.pug:在 student_create_get 函数中使用。
extends layout
block content
  h1= title

  form(method='post' action='')

    label(for='jnuid') 学号:
    input#jnuid(type='number' name='jnuid' min="1000" max="9999" placeholder='输入4位数字' )
    br

    label(for='name') 姓名:
    input#name(type='text' name='name' placeholder='输入姓名' )
    br

    label(for='gender') 性别:
      input#gender(type='radio' name='gender'  value='女')
      label 女
      input#gender(type='radio'  name='gender'  value='男')
      label 男
    br

    label(for='birthday') 生日:
    input#birthday(type='date', name='birthday' )
    br

    label(for='cellphone') 手机:
    input#cellphone(type='tel', name='cellphone' )
    br

    input(type='submit' value='新增')

  form(method='get' action='/')
    input(type='submit' value='取消,返回首页')

  if errors
    ul
      for error in errors
li!= error.msgupdate.pug:在 student_update_get 函数中使用。
extends layout
block content
  h1= title

  form(method='post' action='')

    label(for='jnuid') 学号:
    input#jnuid(type='number' name='jnuid' min="1000" max="9999" placeholder='输入4位数字' value=student_inf[0].jnuid)
    br

    label(for='name') 姓名:
    input#name(type='text' name='name' placeholder='输入姓名' value=student_inf[0].name)
    br

    label(for='gender') 性别:
    if student_inf[0].gender == '女'
      input#gender(type='radio' name='gender' value='女' checked)
      label 女
      input#gender(type='radio' name='gender' value='男')
      label 男
    else if student_inf[0].gender == '男'
      input#gender(type='radio' name='gender' value='女' )
      label 女
      input#gender(type='radio' name='gender' value='男' checked)
      label 男
    br

    label(for='birthday') 生日:
    input#birthday(type='date', name='birthday' value=student_inf[0].birthday)
    br

    label(for='cellphone') 手机:
    input#cellphone(type='tel', name='cellphone' value=student_inf[0].cellphone)
    br

    input(type='submit' value='更新')

  form(method='get' action='/')
    input(type='submit' value='取消,返回首页')

  if errors
    ul
      for error in errors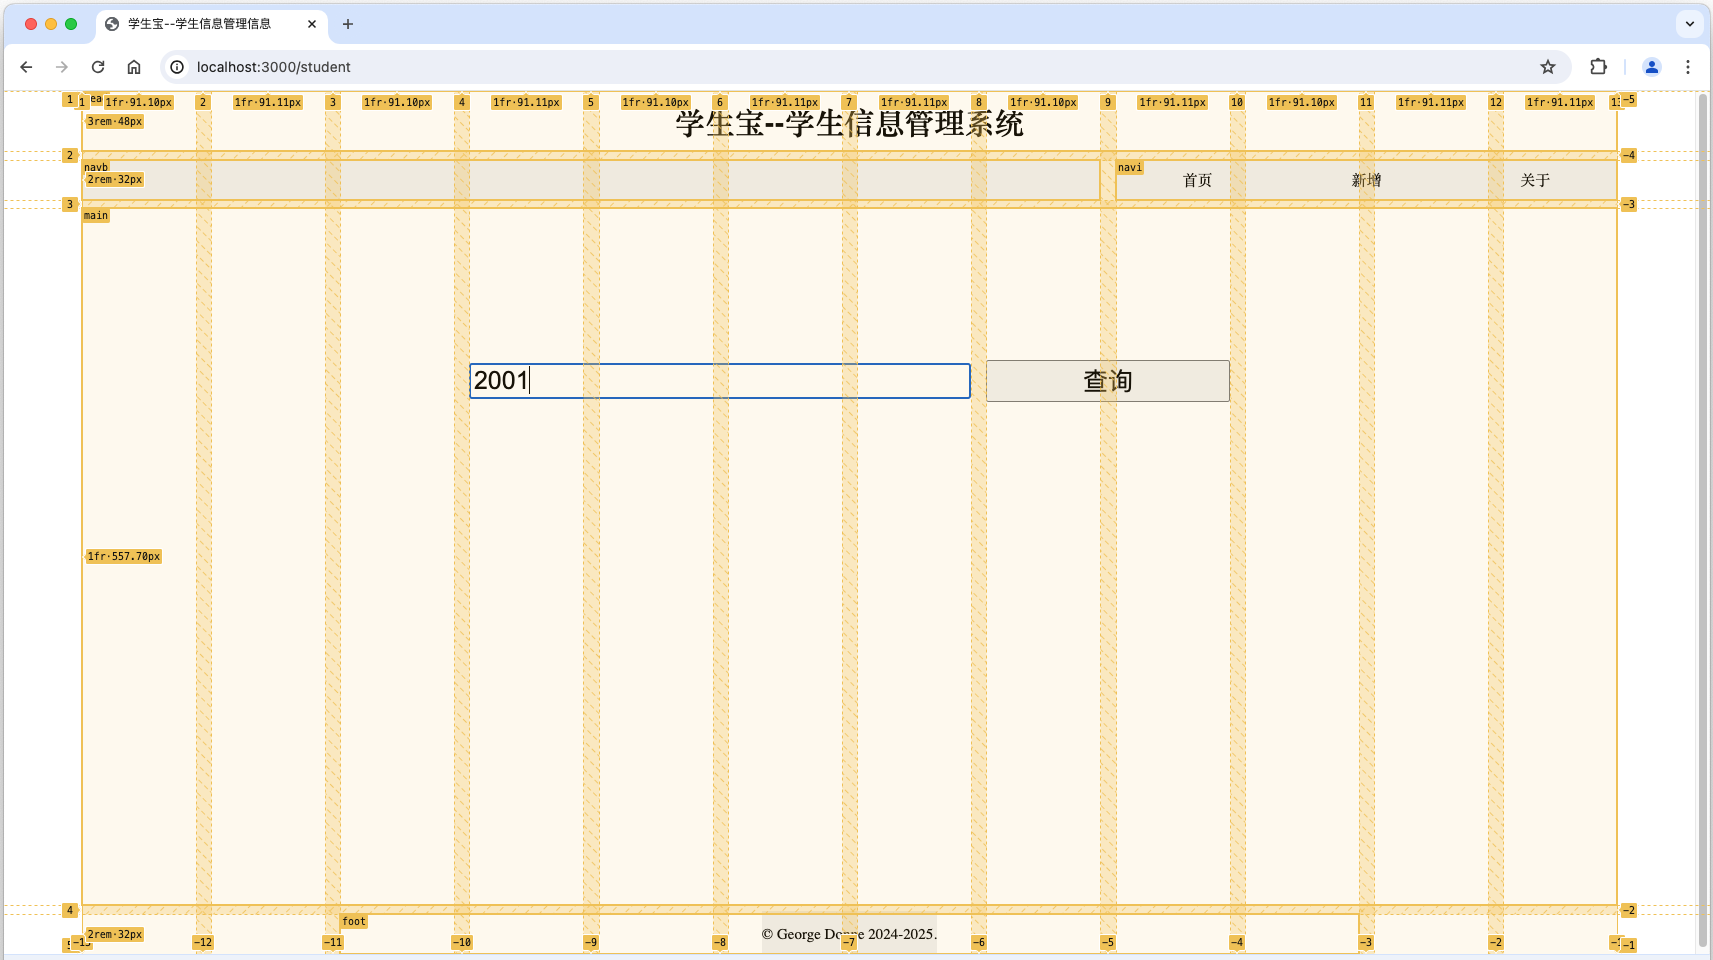
li!= error.msg查询学生信息的相关界面:
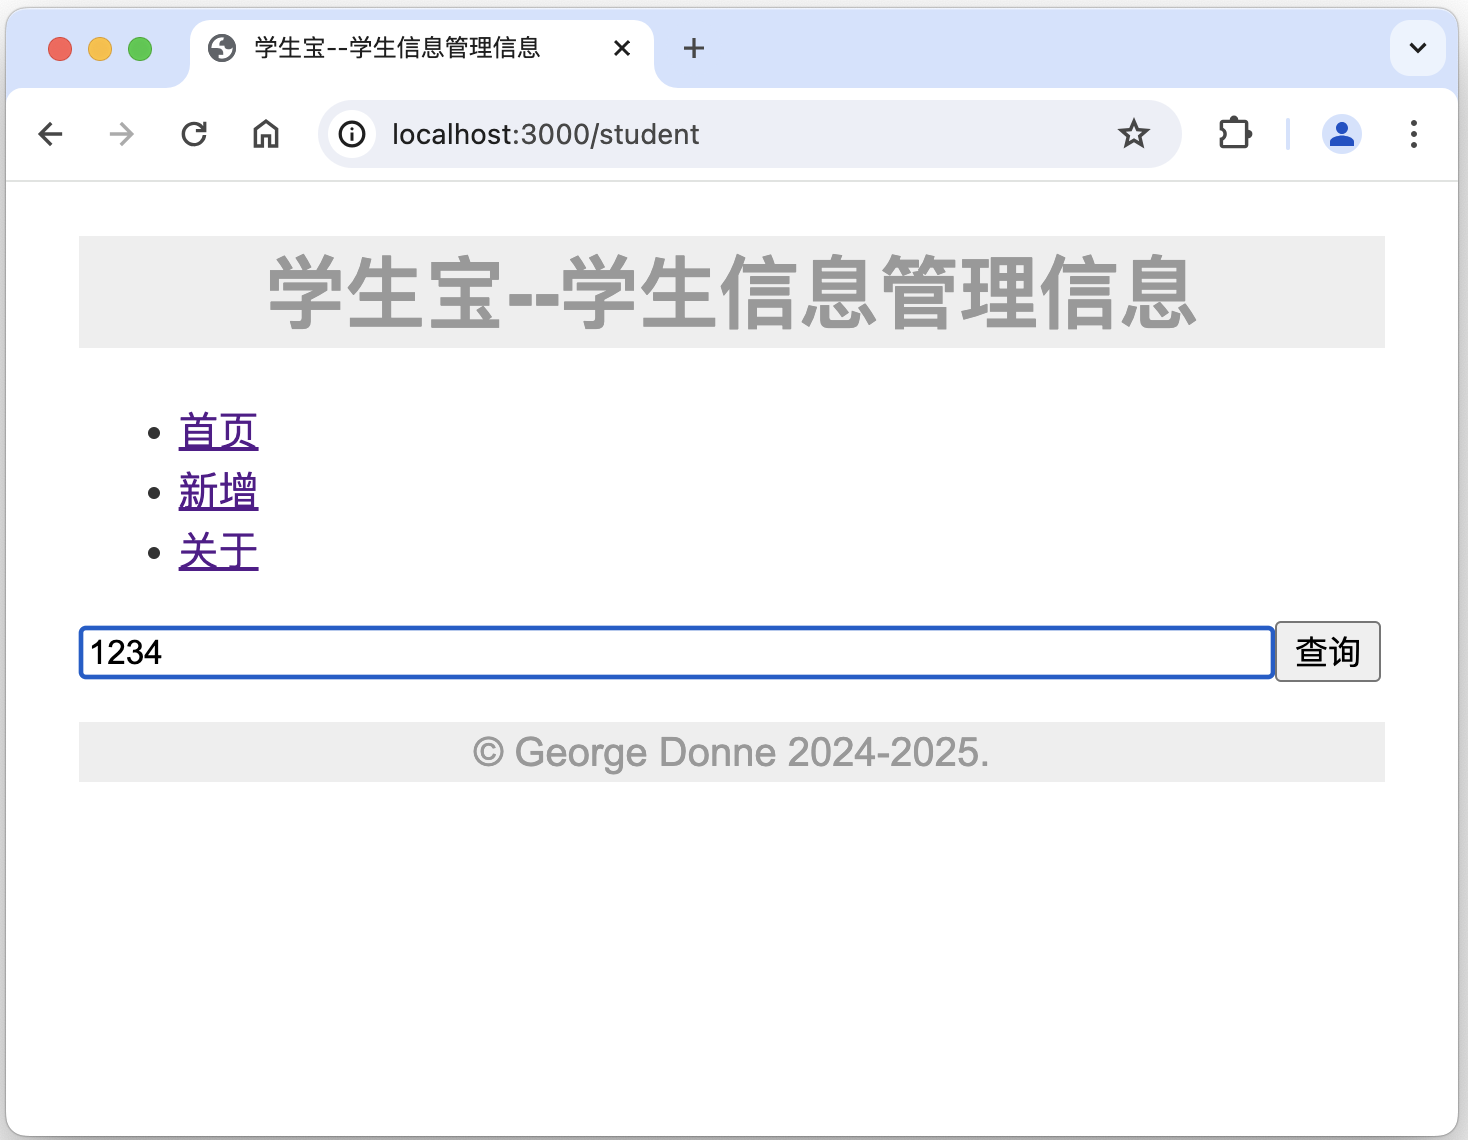
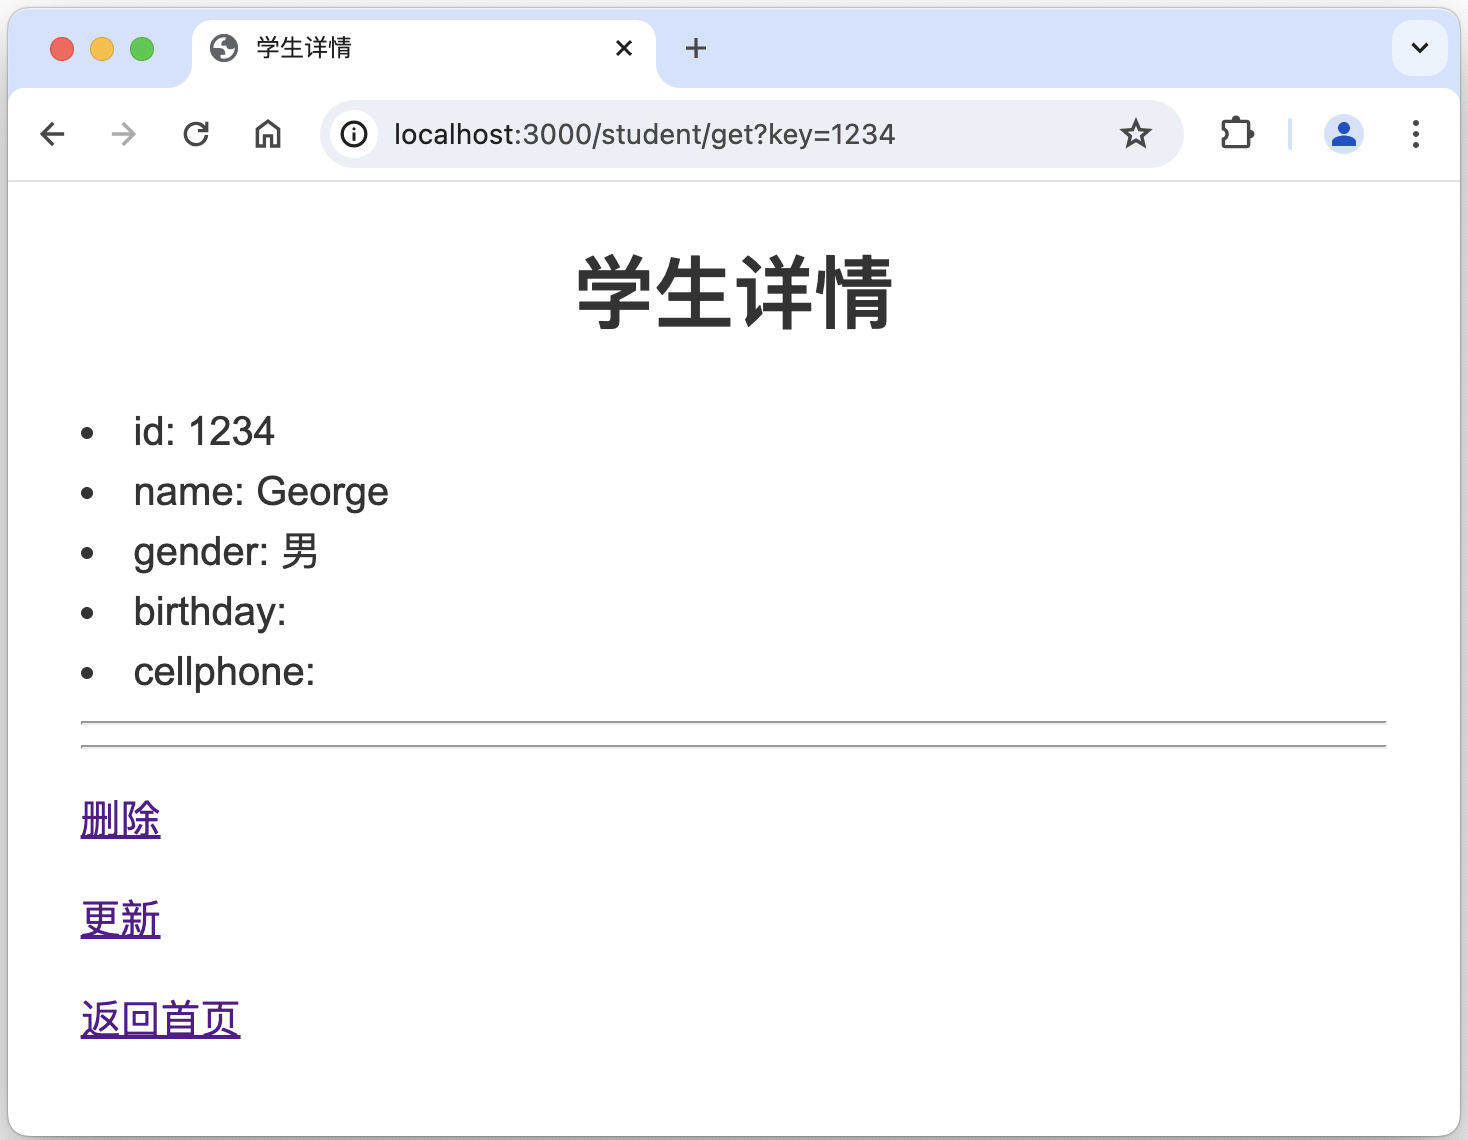
- 访问http://localhost:3000,得到某某信息管理系统主页面/主界面,如下左图所示。
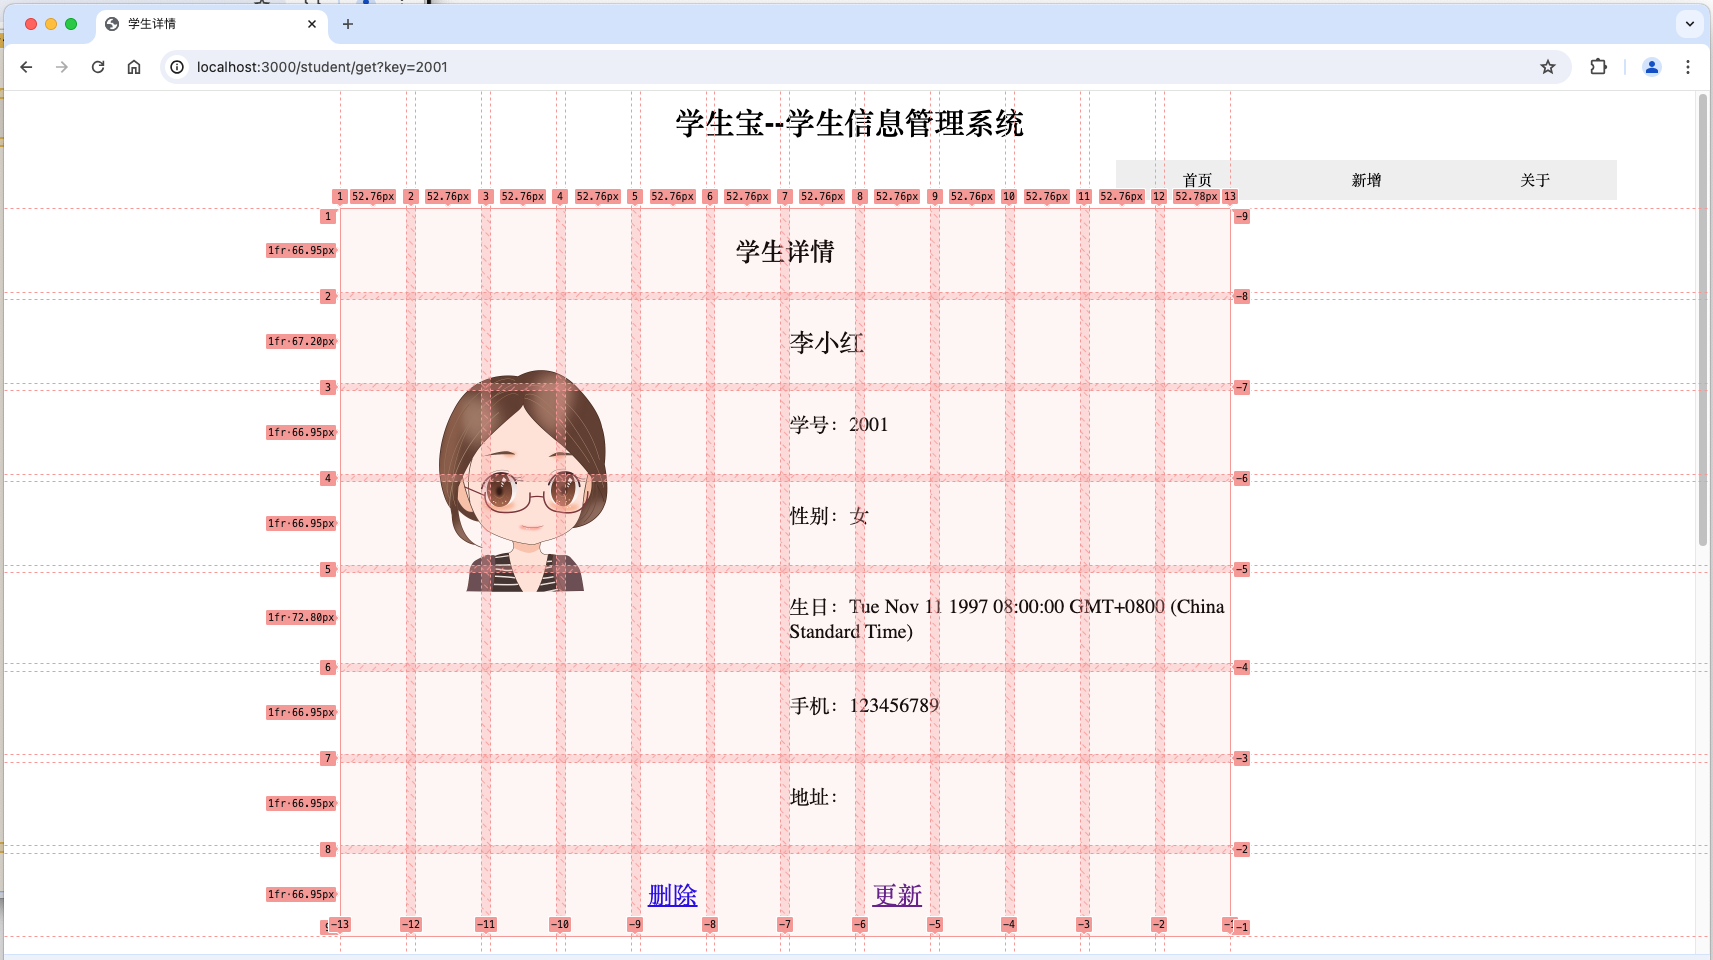
- 在主页面上输入要查询的学号,比如1234,再点击查询按钮,得到学生详情页面,如下右图所示。可以看到URL是 http://localhost:3000/student/get?key=1234。
新增学生信息的相关界面:
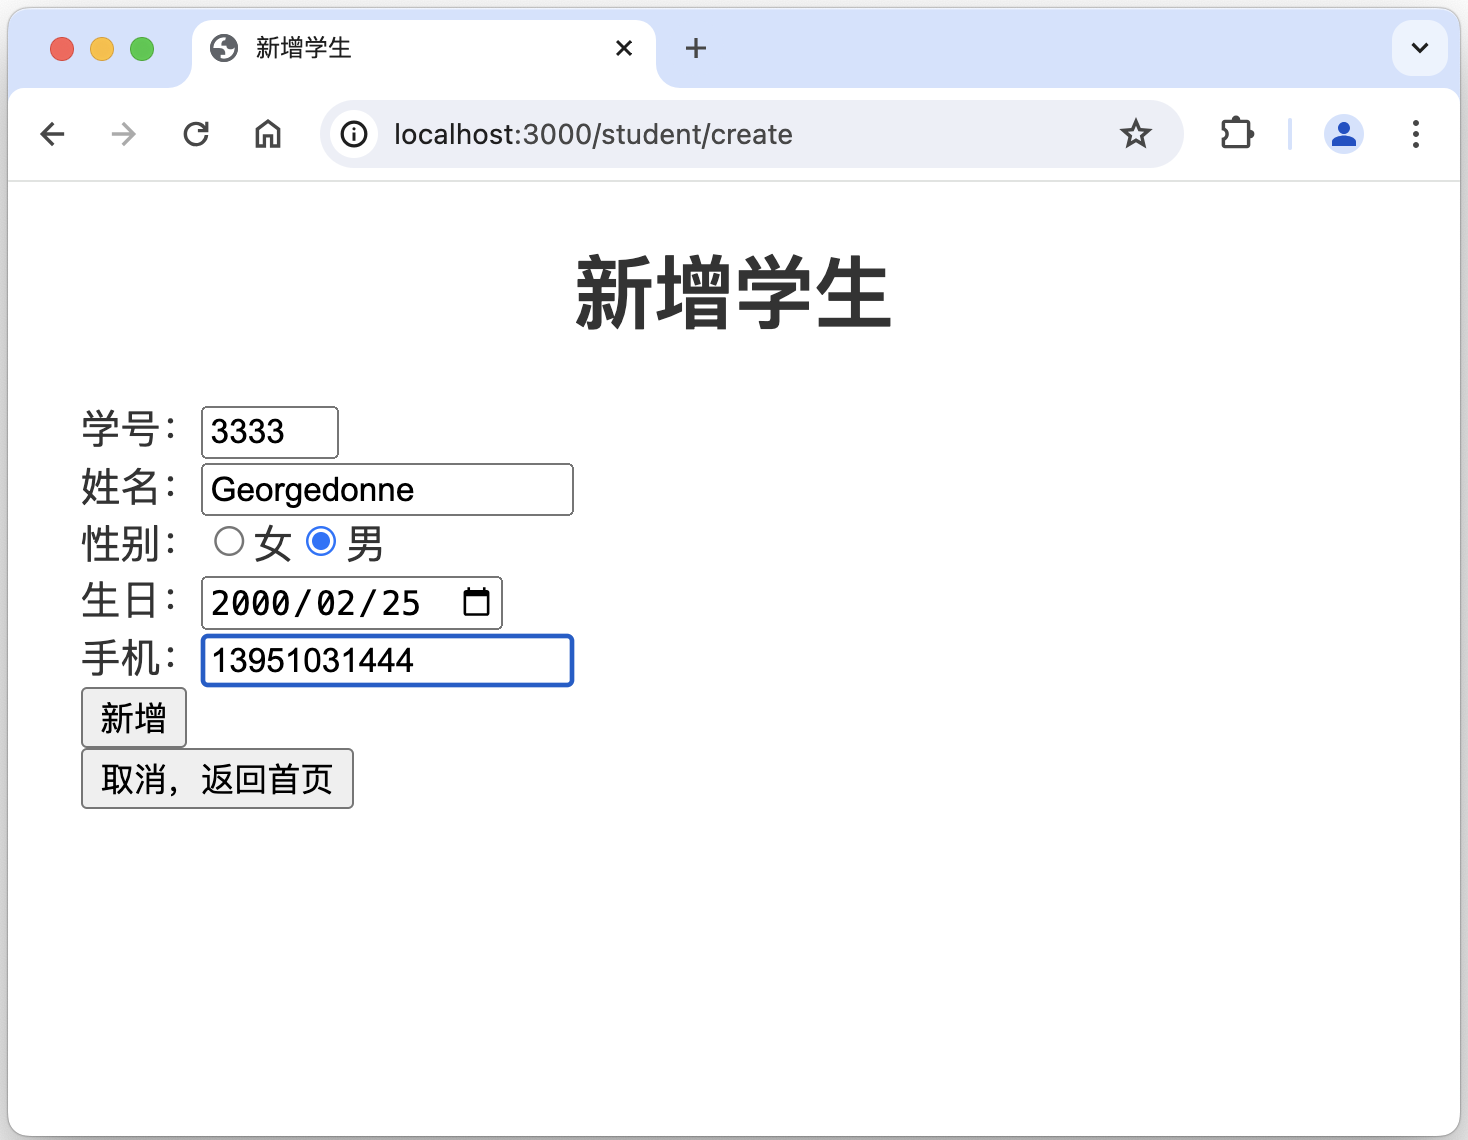
- 点击主页面/主界面的导航栏的新增,相当于访问http://localhost:3000/student/create,web后台返回输入学生信息的界面,如下左图所示。
- 在输入学生信息的界面上输入相关信息,再点击新增按钮,得到学生详情页面,如下右图所示。可以看到URL是 http://localhost:3000/student/get?key=3333,其中3333就是刚新增的学生的学号。

删除学生信息的相关界面:
更新学生信息的相关界面:
结合代码、模版(html页面的模版,.pug文件)、界面截图,尝试理解处理机制,并修改为更适合自己的代码或模版。
接下来章节描述如何加入数据库操作。
加入数据库增删改查CRUD
安装和设置Prisma
执行命令 npx prisma 安装 prisma。
~/appdemo % npx prisma执行命令 npx prisma init 初始化 prisma。
~/appdemo %  npx prisma init

✔ Your Prisma schema was created at prisma/schema.prisma
  You can now open it in your favorite editor.

Next steps:
1. Set the DATABASE_URL in the .env file to point to your existing database. If your database has no tables yet, read https://pris.ly/d/getting-started
2. Set the provider of the datasource block in schema.prisma to match your database: postgresql, mysql, sqlite, sqlserver, mongodb or cockroachdb.
3. Run npx prisma db pull to turn your database schema into a Prisma schema.
4. Run npx prisma generate to generate the Prisma Client. You can then start querying your database.

More information in our documentation:
https://pris.ly/d/getting-started

┌────────────────────────────────────────────────────────────────┐
│  Developing real-time features?                                │
│  Prisma Pulse lets you respond instantly to database changes.  │
│  https://pris.ly/cli/pulse                                     │
└────────────────────────────────────────────────────────────────┘
参考 npx prisma init 命令执行结果的提示 -- step1,修改 .env 文件的 DATABASE_URL。
# Environment variables declared in this file are automatically made available to Prisma.
# See the documentation for more detail: https://pris.ly/d/prisma-schema#accessing-environment-variables-from-the-schema

# Prisma supports the native connection string format for PostgreSQL, MySQL, SQLite, SQL Server, MongoDB and CockroachDB.
# See the documentation for all the connection string options: https://pris.ly/d/connection-strings

# DATABASE_URL="postgresql://johndoe:randompassword@localhost:5432/mydb?schema=public"
DATABASE_URL="mysql://root:Lily093897@localhost:3306/gdtest?schema=public"
参考 npx prisma init 命令执行结果的提示 -- step2,修改 prisma/schema.prisma 文件的 provider 为 mysql。
// This is your Prisma schema file,
// learn more about it in the docs: https://pris.ly/d/prisma-schema

// Looking for ways to speed up your queries, or scale easily with your serverless or edge functions?
// Try Prisma Accelerate: https://pris.ly/cli/accelerate-init

generator client {
  provider = "prisma-client-js"
}

datasource db {
  // provider = "postgresql"
  provider = "mysql"
  url      = env("DATABASE_URL")
}
参考 npx prisma init 命令执行结果的提示 -- step3,执行 npx prisma db pull。
~/appdemo % npx prisma db pull
Prisma schema loaded from prisma/schema.prisma
Environment variables loaded from .env
Datasource "db": MySQL database "gdtest" at "localhost:3306"

✔ Introspected 2 models and wrote them into prisma/schema.prisma in 92ms

Run npx prisma generate to generate Prisma Client.
参考 npx prisma init 命令执行结果的提示 -- step4,执行 npx prisma generate。
~/0gdh/gdv2web/appdemo % npx prisma generate
Environment variables loaded from .env
Prisma schema loaded from prisma/schema.prisma

✔ Generated Prisma Client (v5.14.0) to ./node_modules/@prisma/client in 120ms

Start using Prisma Client in Node.js (See: https://pris.ly/d/client)
```
import { PrismaClient } from '@prisma/client'
const prisma = new PrismaClient()
```
or start using Prisma Client at the edge (See: https://pris.ly/d/accelerate)
```
import { PrismaClient } from '@prisma/client/edge'
const prisma = new PrismaClient()
```

See other ways of importing Prisma Client: http://pris.ly/d/importing-client

┌─────────────────────────────────────────────────────────────┐
│  Deploying your app to serverless or edge functions?        │
│  Try Prisma Accelerate for connection pooling and caching.  │
│  https://pris.ly/cli/--accelerate                           │
└─────────────────────────────────────────────────────────────┘
执行 npm install @prisma/client,安装 prisma 客户端。
~/appdemo % npm install @prisma/client

added 2 packages, and audited 163 packages in 15s

17 packages are looking for funding
  run `npm fund` for details

7 vulnerabilities (2 low, 5 high)

To address issues that do not require attention, run:
  npm audit fix

To address all issues, run:
  npm audit fix --force

Run `npm audit` for details.
在 studentCtroller.js 顶部引入 prisma client。
// import prisma client
const { PrismaClient } = require('@prisma/client')
const prisma = new PrismaClient()
从数据库中查询学生信息
修改 student_get 函数,调用prisma 的 findMay() API。代码如下所示:
/// Get student information
/**
 * 1. to respond GET request by URL: localhost:3000/student/get.
 * 2. to return student detail page (rendered with student_detail.pug) to browser.
 */
exports.student_get = async function (req, rsp, next) {
    try {

        // students of prisma.students.findMany is the table name in db.
        const studentInf = await prisma.students.findMany({
            where: {
                //key of req.querey.key is the value of key in url localhost:3000/student/get?key=1101, i.e., 1101
                jnuid: Number(req.query.key)
            }
        })

        console.log("studentInf: ", studentInf)

        rsp.render(
            'student_detail',
            {
                title: '学生详情',
                student_inf: studentInf,
            }
        );
    } catch (e) {
        console.error(e);
        await prisma.$disconnect();
        rsp.send(e);
    }
};
查询结果如下:
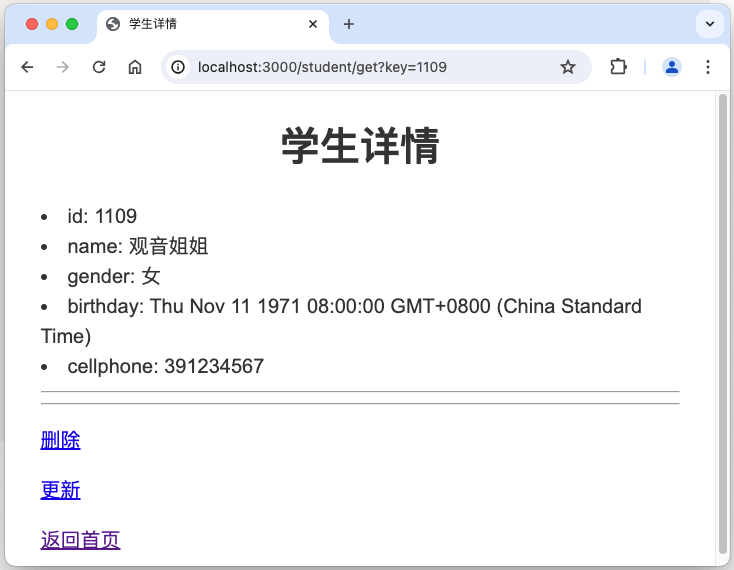
后台打印结果如下:
studentInf:  [
  {
    jnuid: 1109,
    name: '观音姐姐',
    gender: '女',
    birthday: 1971-11-11T00:00:00.000Z,
    cellphone: '391234567',
    address: '蠡湖大道1800号',
    photo: null
  }
]
GET /student/get?key=1109 200 29.938 ms - 471
GET /stylesheets/style.css 304 3.514 ms - -
至此,某某信息管理系统的 Web 界面和数据库的“真实”数据已对接!
新增学生信息到数据库
修改 student_create_post() 函数为如下样例代码:
exports.student_create_post = async function (req, rsp, next) {
    try {
        // insert student information into database.
        const studentInf = await prisma.students.create({
            data: {
                jnuid: Number(req.body.jnuid),
                name: req.body.name,
                gender: req.body.gender,
                //birthday: req.body.birthday,
                //Invalid value for argument `birthday`: premature end of input. Expected ISO-8601 DateTime.
                birthday: '1997-11-11T12:10:10.000Z',
                cellphone: req.body.cellphone,
            },
        })
        rsp.redirect("/student/get?key=" + req.body.jnuid);

    } catch (e) {
        console.error(e);
        await prisma.$disconnect();
        rsp.send(e);
    }
};
测试新增功能,相关截图如下:
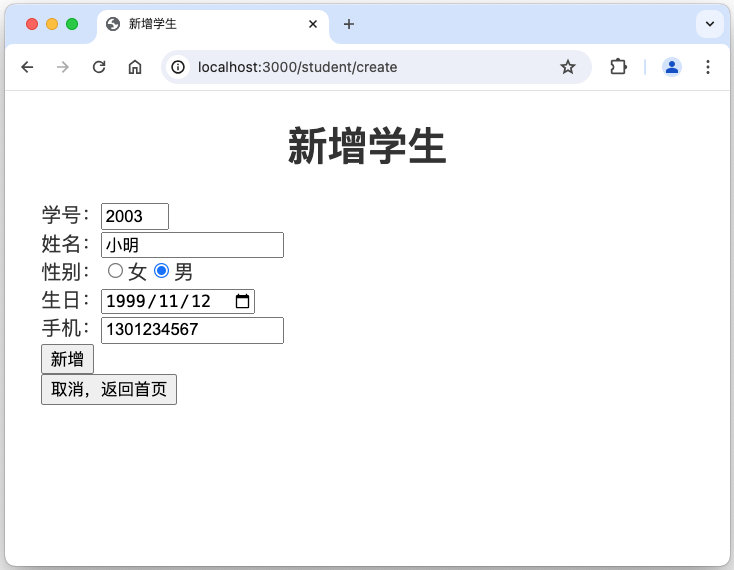
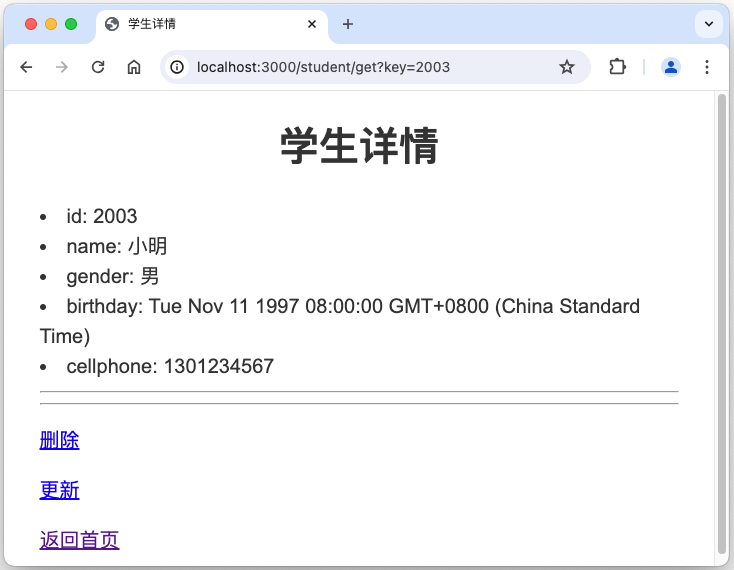
至此,通过某某信息管理系统的 Web 界面,可以新增学生信息到数据库了!
birthday 还无法插入到数据库中,留待后续解决。相关报错:Invalid value for argument `birthday`: premature end of input. Expected ISO-8601 DateTime
从数据库中删除学生信息
修改 student_delete_get()、student_delete_post() 函数为如下样例代码:
exports.student_delete_get = async function (req, rsp, next) {
    try {
        const studentInf = await prisma.students.findMany({
            where: {
                jnuid: Number(req.params.id)
            }
        })

        rsp.render(
            'delete_get',
            {
                title: '学生详情--即将删除',
                student_inf: studentInf,
            }
        );

    } catch (e) {
        console.error(e);
        await prisma.$disconnect();
        rsp.send(e);
    }
};

exports.student_delete_post = async function (req, rsp, next) {
    try {

        const studentInf = await prisma.students.delete({
            where: {
                jnuid: Number(req.params.id)
            }
        })

        // console.log("studentInf: ", studentInf);

        rsp.render(
            'delete_post',
            {
                title: '学生信息已删除',
                stuid: req.params.id,
            }
        );
    } catch (e) {
        console.error(e);
        await prisma.$disconnect();
        rsp.send(e);
    }
};
更新学生信息到数据库中
修改 student_update_get()、student_update_post() 函数为如下样例代码:
exports.student_update_get = async function (req, rsp, next) {
    try {

        const studentInf = await prisma.students.findMany({
            where: {
                jnuid: Number(req.params.id)
            }
        })

        rsp.render(
            'update',
            {
                title: '更新学生',
                student_inf: studentInf,
            }
        );

    } catch (e) {
        console.error(e);
        await prisma.$disconnect();
        rsp.send(e);
    }
};

/// Update a student
/**
 * 1. to respond POST request by URL: localhost:3000/student/update/:id. e.g., update/1234.
 * 2. to return student detail page to browser if operation is done.
 */
exports.student_update_post = async function (req, rsp, next) {
    try {
        const studentInf = await prisma.students.update({
            where: {
                jnuid: Number(req.body.jnuid),
            },
            data: {
                jnuid: Number(req.body.jnuid),
                name: req.body.name,
                gender: req.body.gender,
                //birthday: req.body.birthday,
                //Invalid value for argument `birthday`: premature end of input. Expected ISO-8601 DateTime.
                birthday: '1997-11-11T12:10:10.000Z',
                cellphone: req.body.cellphone,
            },
        })

        console.log("studentInf: ", studentInf);

        rsp.redirect("/student/get?key=" + req.body.jnuid);
    } catch (e) {
        console.error(e);
        await prisma.$disconnect();
        rsp.send(e);
    }
};
优化页面布局Layout
采用 CSS 网格布局(Grid Layout)优化页面布局。
使用网格布局(也叫栅格),先要定义网格,即水平方向有多少列、垂直方向有多少行,行列交叉形成网格形状。 如下左图是主界面的布局,相关CSS代码片段如下1-43所示。简要说明如下:
- line 8:按 grid 布局显示。
- line 10:定义水平方向有12列。写了12个1fr,fr是 fraction 的意思,1fr理解为1个等分,因此有12个基本等宽的列。截图中顶部显示1fr大致是91px。改变浏览器的宽度时,1fr会随之增大或缩小。
- line 11:定义垂直方向有4行。rem是一种单位,全称是Font size of the root element(根元素的字体大小),当前设置了整个网页根元素的字体大小是 16px,因此1、2、4行都是固定高度,分别是48px、32px、32px。截图左边也是显示了这样的数字。第3行高度是1fr,参考line 10相关说明,在此不再赘述。
- line 12:定义列与列之间,以及行与行之间的间隔。否则,就都连在一起。
- line 14-18:定义网格的区域名字。12列、4行,共48个区域,每个区域都给了名字。结合line 21-43,就把相关内容排放到了指定的位置上。
网格布局可以一层层嵌套,类似俄罗斯套娃。查询结果的页面中,学生详情信息也是一个子网格的布局,如下右图所示。简要说明如下:
- line 47-48:定义学生详情子网格,在父网格中的位置。垂直方向在第1行。水平方向在第3线到第10线,就是第3列到第9列,因为12列共有13个竖线(加上头尾)。
CSS 代码片段如下:
/*定义主界面的布局(代码片段)*/
body {
    /*可视区域90%,margin设置为auto后可居中显示*/
    width: 90vw;
    height: 100vh;
    margin: auto;

    display: grid;

    grid-template-columns: 1fr 1fr 1fr 1fr 1fr 1fr 1fr 1fr 1fr 1fr 1fr 1fr;
    grid-template-rows: 3rem 2rem 1fr 2rem;
    gap: 1%;

    grid-template-areas:
        "head head head head head head head head head head head head"
        "navb navb navb navb navb navb navb navb navi navi navi navi"
        "main main main main main main main main main main main main"
        ". . foot foot foot foot foot foot foot foot . .";
}

header {
    grid-area: head;
    justify-self: center;
    align-self: center;
}

main {
    grid-area: main;
    justify-self: center;
    align-self: center;
}

nav {
    grid-area: navi;
    justify-self: center;
    align-self: center;
}

footer {
    grid-area: foot;
    justify-self: center;
    align-self: center;
}

/* 定义学生详情界面的布局 */
section.student-detail {
    grid-row: 1;
    grid-column: 3/10;
    align-self: center;
    font-size: 1rem;

    margin: 0;

    display: inherit;
    width: 100%;
    /*height: 100%;*/
    grid-template-columns: inherit;
    grid-template-rows: 1fr 1fr 1fr 1fr 1fr 1fr 1fr 1fr;
    gap: inherit;
}


h2.student-detail {
    grid-row: 1;
    grid-column: 1/13;
    align-self: center;
    justify-self: center;
}

p.student-name {
    grid-row: 2;
    grid-column: 7/13;
    align-self: auto;

    font-size: 1.25rem;

}

p.student-id {
    grid-row: 3;
    grid-column: 7/13;
    align-self: auto;
}

p.student-gender {
    grid-row: 4;
    grid-column: 7/13;
    align-self: auto;
}

p.student-birthday {
    grid-row: 5;
    grid-column: 7/13;
    align-self: auto;
}

p.student-cellphone {
    grid-row: 6;
    grid-column: 7/13;
    align-self: auto;
}

p.student-address {
    grid-row: 7;
    grid-column: 7/13;
    align-self: auto;
}

img.student-photo {
    grid-row: 2/6;
    grid-column: 1/6;
    align-self:center;
    justify-self: center;
    max-width: 200px;
}

a.student-delete {
    grid-row: 8;
    grid-column: 5/6;
    align-self: center;
    justify-self: center;
    font-size: 1.25rem;
}

a.student-update {
    grid-row: 8;
    grid-column: 8/9;
    align-self: center;
    justify-self: center;
    font-size: 1.25rem;
}
网格布局相对容易预知布局效果,是非常灵活且可控的。在上述基础上,再进一步优化美化,就可以得到相对高大上的界面了。比如:
- 调整相关内容的字体、大小、颜色。
- 主页面下半部加些元素。比如三个不同颜色的圆圈,显示学生数、课程数、成绩数,等。如何配色,可参考网上相关配色网站。
- 或者主界面左1/3放好看的背景图,右2/3维持现状。
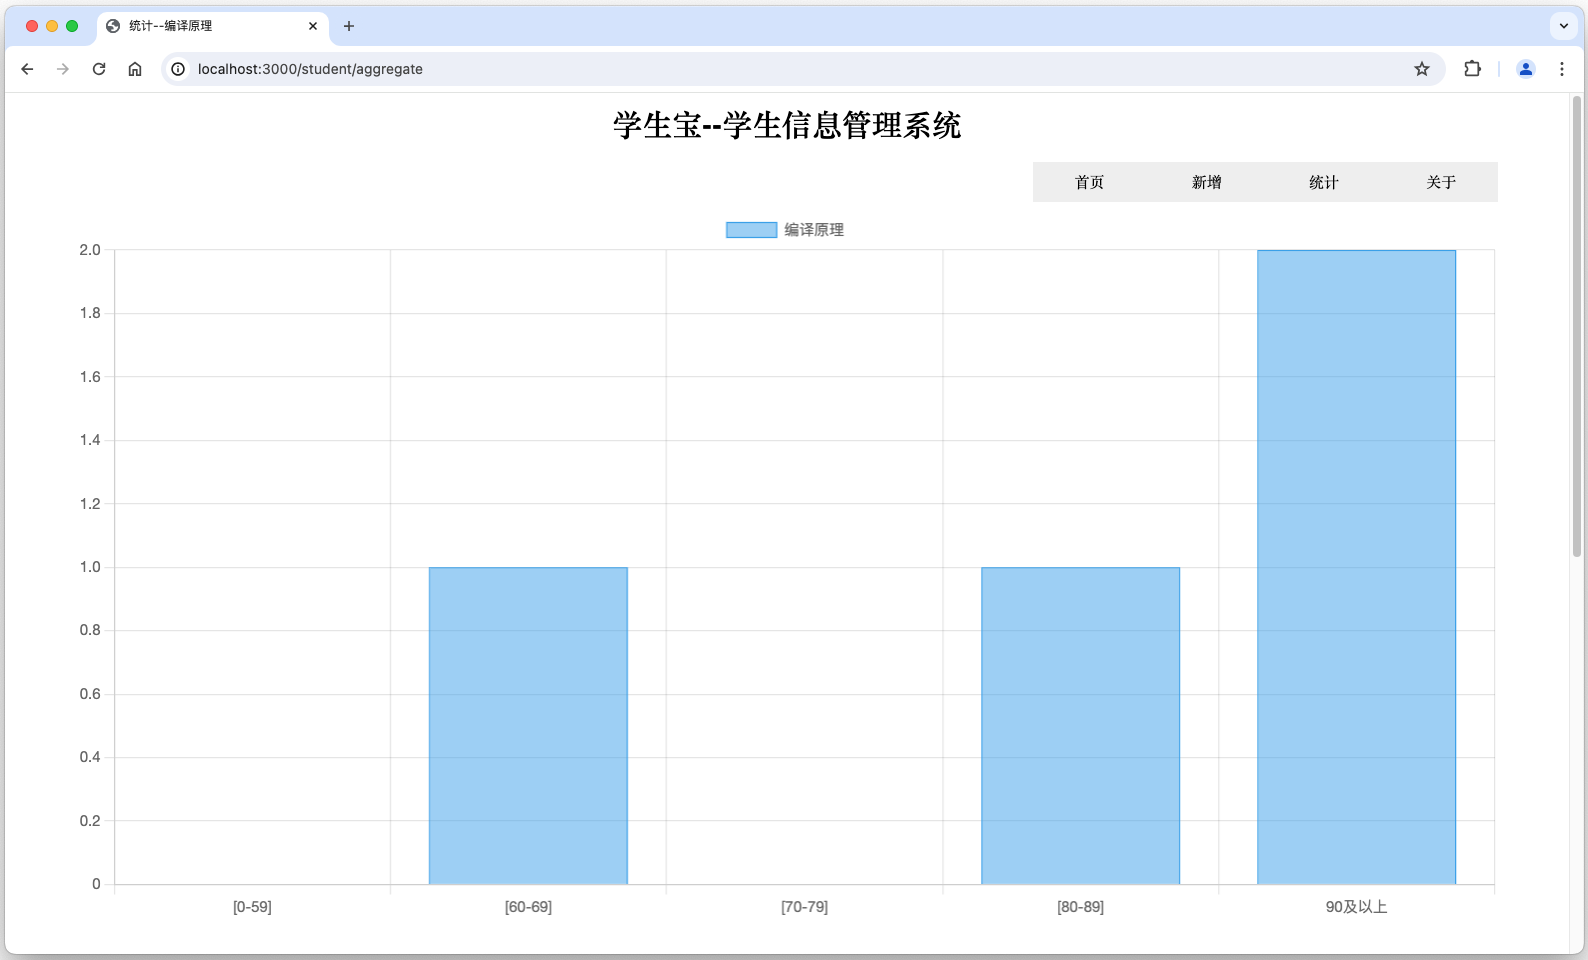
统计信息并显示柱状图
信息管理系统通常还需要统计功能,并将统计结果显示为图表(比如柱状图)。以下以统计成绩段为例,比如60分以下、60-70分、70-80分、80-90分、90-100分的成绩有多少,并显示为柱状图。
安装Chart.js
执行 npm install chart.js 安装 Chart.js。
~/appdemo % npm install chart.js

added 2 packages, and audited 165 packages in 4s

17 packages are looking for funding
  run `npm fund` for details

7 vulnerabilities (2 low, 5 high)

To address issues that do not require attention, run:
  npm audit fix

To address all issues, run:
  npm audit fix --force

Run `npm audit` for details.
统计结果样例如下图所示:
./controllers/studentController.js 增加以下代码:
/// 统计成绩分段数量
exports.student_aggregate = async function (req, rsp, next) {
    try {
        const courseSummary = '编译原理';

        const scoreSummary = await prisma.$queryRaw`select sum(case when score between 0 and 59 then 1 else 0 end) as "[0-59]",sum(case when score between 60 and 69 then 1 else 0 end) as "[60-69]",sum(case when score between 70 and 79 then 1 else 0 end) as "[70-79]",sum(case when score between 80 and 89 then 1 else 0 end) as "[80-89]",sum(case when score>=90 then 1 else 0 end) as "90及以上" from score where course=${courseSummary}`;

        rsp.render(
            "aggregate",
            {
                title: "统计--" + courseSummary,
                score_summary_labels: Object.keys(scoreSummary[0]),
                score_summary_data: Object.values(scoreSummary[0]),
                course_summary: courseSummary,
            });

    } catch (e) {
        console.error(e);
        await prisma.$disconnect();
        rsp.send(e);
    }
};
./routes/student.js 增加如下代码:
// 统计成绩
router.get("/aggregate", student_controller.student_aggregate);
在 ./view 目录中新增 aggregate.pug,内容如下:
extends layout

block content
  header
    h1 学生宝--学生信息管理系统

  nav
    a(href="/") 首页
    a(href="/student/create") 新增
    a(href="/student/aggregate") 统计
    a(href="/about") 关于

  //- ul
    li #{student_inf.length}
  main

    //- id of canvas is myChart
    canvas#myChart

    script(src='https://cdn.jsdelivr.net/npm/chart.js')


    script.
      const ctx = document.getElementById('myChart');
      new Chart(ctx, {
          type: 'bar',
          data: {
              //- labels: '#{course_summary}',
              //- labels: #{hlabels},
              labels: ['#{score_summary_labels[0]}','#{score_summary_labels[1]}','#{score_summary_labels[2]}','#{score_summary_labels[3]}','#{score_summary_labels[4]}'],
              datasets: [{
                  label: '#{course_summary}',
                  data: [#{score_summary_data}],
                  borderWidth: 1
              }]
          },
          options: {
              scales: {
                  y: {
                      beginAtZero: true
                  }
              }
          }
      });

  footer#homefooter
    p © George Donne 2024-2025.
附录--相关软件/软件包安装
编辑器--Visual Studio Code
要编写程序(虽然 html 不是编程语言,只是标记语言)总需要一款适合自己的编辑器软件,比如能够高亮显示编程语言的保留字,比如可以排版 html 文件(就是全文按层级统一缩进4个空格之类的)。推荐安装 Visual Studio Code 作为编辑器。其他编辑器也是可以的,只要适合自己就好。
- 安装过程不复杂,在此不赘述。
- 学院网络似乎不能访达该网址。可尝试切换其他网络,或从其他网站下载安装包。
JavaScript运行环境--Node.js
充当Web服务器。
Node.js 官网下载地址
说明:
- 安装过程不复杂,在此不赘述。
- 安装完成后,可以尝试官网给出的 Create an HTTP Server 样例。
其他软件包
其他软件包基本都是基于 Node.js 的插件。将在构建Web界面过程中按需安装。